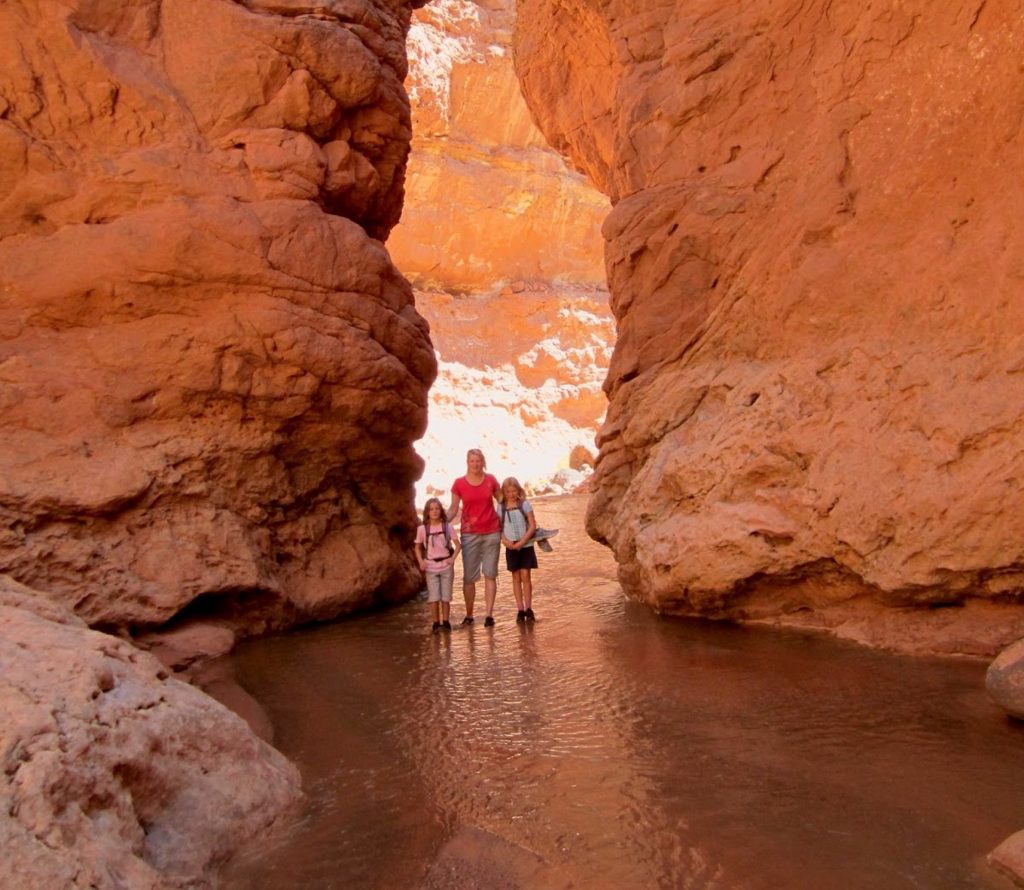
Utah’s National Parks offer some of the most spectacular hiking opportunities in the world. With towering sandstone arches, deep canyons, and otherworldly rock formations, Utah’s national parks offer a variety of hiking trails to suit all levels of experience. Any trip to Utah’s National Parks will leave your heart full and ready to come back and experience some more.
Posts Highlights
Whether you’re a seasoned hiker or just starting to explore the trails for the first time, you can confidently hit the trails when you’re prepared.
You can prepare by researching your trail and local conditions using apps such as Duoveo and reading the comments about current trail conditions.
But most importantly, you can prepare by carrying the ten essentials in your pack.
- A First Aid Kit
- Hydration (always bring more than you think you need)
- Food (bring all the snacks to keep your energy up on the trail)
- Safety: Flashlight or Headlamp, fire kit, and whistle
- Layers of clothes (to combat whatever weather conditions bring)
- Knife or multi-tool
- Navigation (map, GPS, compass)
- Sun Protection ( I always carry sunscreen, sunglasses, and a hat or visor)
- Emergency shelter (A bivy is essentially a space blanket shaped like a sleeping bag. They’re inexpensive and lightweight)
- Toilet paper and trowel or, better yet, Wag Bags.
Specific Gear
In addition to the ten essentials, you’ll need:
- Large Water Bottles or hydration system. Notably, you’ll be drinking lots of Water. Not only are the Utah National Parks desert environments but they are also located at high elevations. The lowest point is 4,000 feet above sea level to points as high as 9,000 feet or more. This will contribute to higher-than-normal water consumption to keep you hydrated.
- Hiking Poles. Likewise, many of the trails listed here and others in the parks have steep inclines, uneven footing, and sometimes require walking in water. Hiking poles will increase your stabilization and help you hike faster and longer. Consider them your All-Wheel drive.
- Sturdy Water Shoes and Good Hiking Shoes/Boots. Similarly, you’ll need a closed-toe hiking sandal or water shoe for water hikes such as the Zion Narrows and Sulphur Creek Narrows. You want to ensure that your feet and ankles have good support as you walk through the rocky river beds. If hiking in seasons other than summer, you’ll need a hiking boot and neoprene socks suitable for the cold water.
The rugged terrain of the Utah national parks requires a grippy sole and supportive shoe/boot that will keep your feet happy for miles on the trails.
- Rain Jacket. Even though this is the desert, storms can come up suddenly, especially in monsoon season. (July through September)
Best Time to Visit the Utah National Parks
The ideal seasons to visit are spring and fall. The temperatures are ideal for hiking, and the precipitation is low. From personal experience hiking the parks, late March/early April and October are the best times to hit the parks. Bring layers as the temperatures drop quickly in the desert when the sun goes down.
The Utah National Parks cost between $20-35 per vehicle for a 7-day pass. If visiting multiple parks, consider buying the America the Beautiful Annual pass for $80. This pass will provide you admission to all 425 sites managed by the National Parks System at no additional cost.
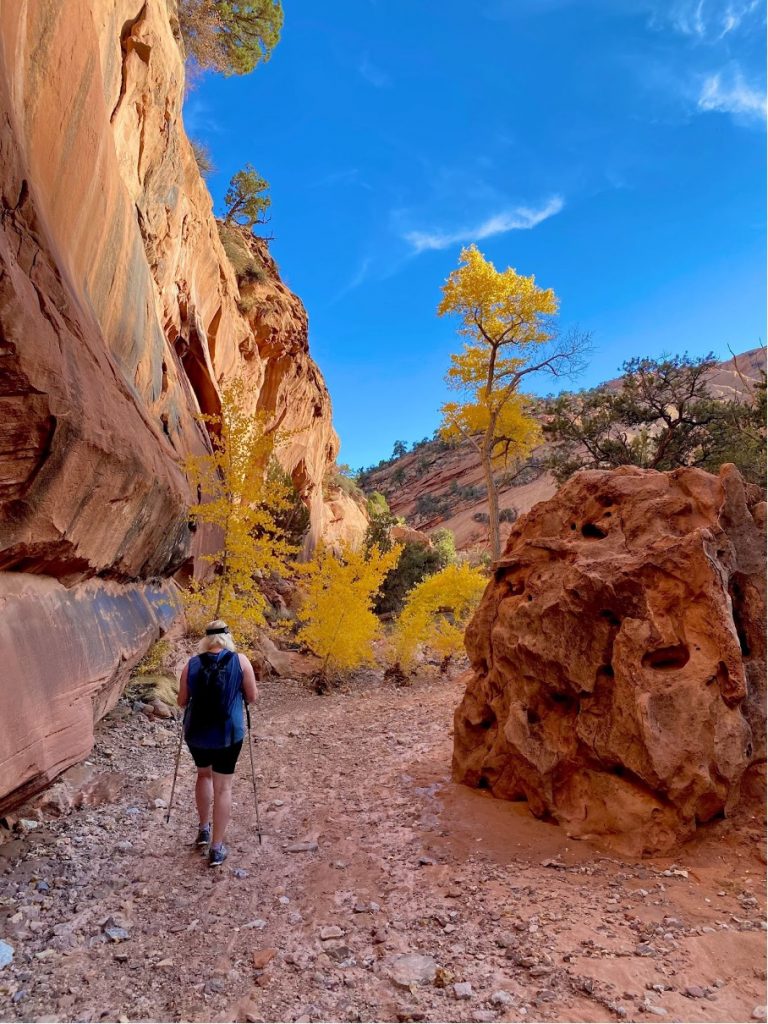
Recreate Responsibly
There are seven Leave No Trace principles that you need to know before you hit the trails. It’s more than just packing out your trash.
1. Plan Ahead and Prepare.
Learn about the trail and its conditions so you are adequately prepared with what you need and the appropriate resources to finish your route.
2. Travel and Camp on Durable Surfaces.
Stay on the trails to protect vegetation and cryptobiotic soil. Don’t create side trails to avoid mud. If traveling cross country, stick to rock or dry washes to minimize your impact.
3. Dispose of Waste Properly.
This includes packing out all your trash and following local regulations about the disposal of toilet paper and poop. Many national parks and other areas require you to pack it all out.
4. Leave it as you found it.
Rock cairns (stacked rocks) look fun, but unofficial cairns can confuse hikers leading them off a trail, and no one wants to get lost out in the wilderness. You also can disturb fragile ecosystems by moving rocks. Don’t carve on rocks or trees. It is illegal in the parks and can result in hefty fines and even jail time.
5. Minimize Campfire Impact.
This means only using fire when necessary and only if local regulations allow.
6. Respect Wildlife.
Give the animals plenty of space and educate yourself about handling an encounter. Ask yourself, Do I know the difference between how to handle an encounter with a bear or a mountain lion?
7. Be Considerate of Others.
Uphill hikers have the right of way. Keep your noise level low and smile. After all, you’re enjoying some of the most amazing landscapes on earth.
The 10 Best Trails in Utah’s National Parks
These ten trails are my top recommendations from hiking in the Utah National Parks over the last 27 years. They highlight some of the best features in each park. Be inspired by the myriad opportunities and landscapes that Utah’s mighty five offer.
The Best Hikes in Zion National Park
Angel’s Landing
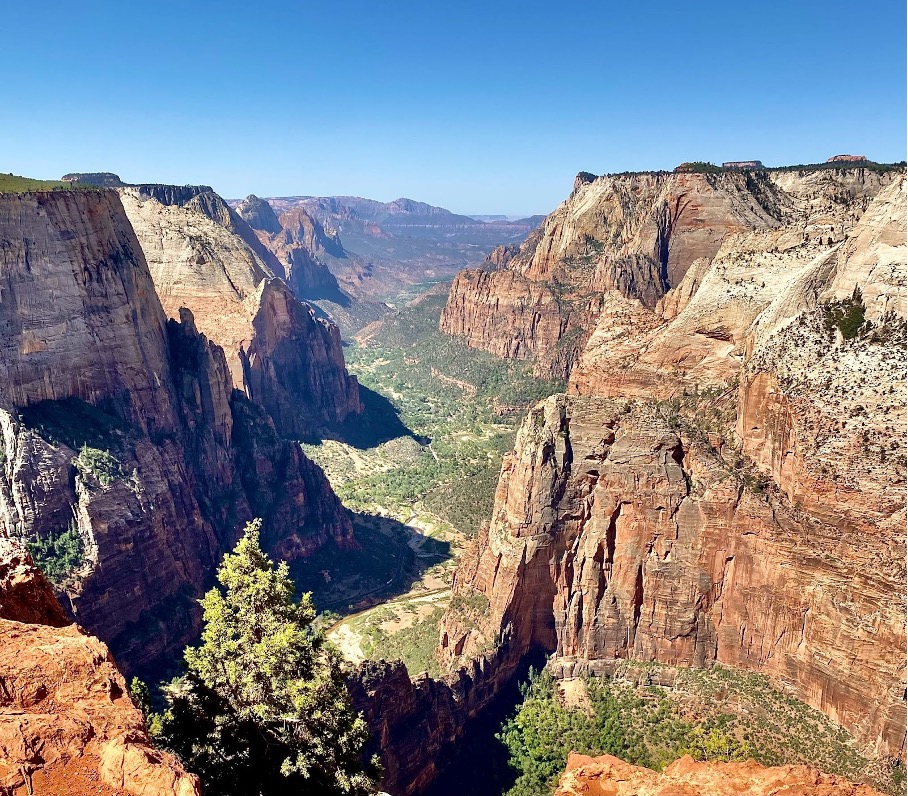
Angel’s Landing is one of the most spectacular hikes in the world. Many flock to Zion National Park for the opportunity to hike the chains up to the viewpoint over Zion Canyon. While the views throughout this hike are just awe-inspiring, this hike is just as much about the accomplishment. To begin, the sheer drop-off on both sides of you during the chains section is not for the faint of heart!
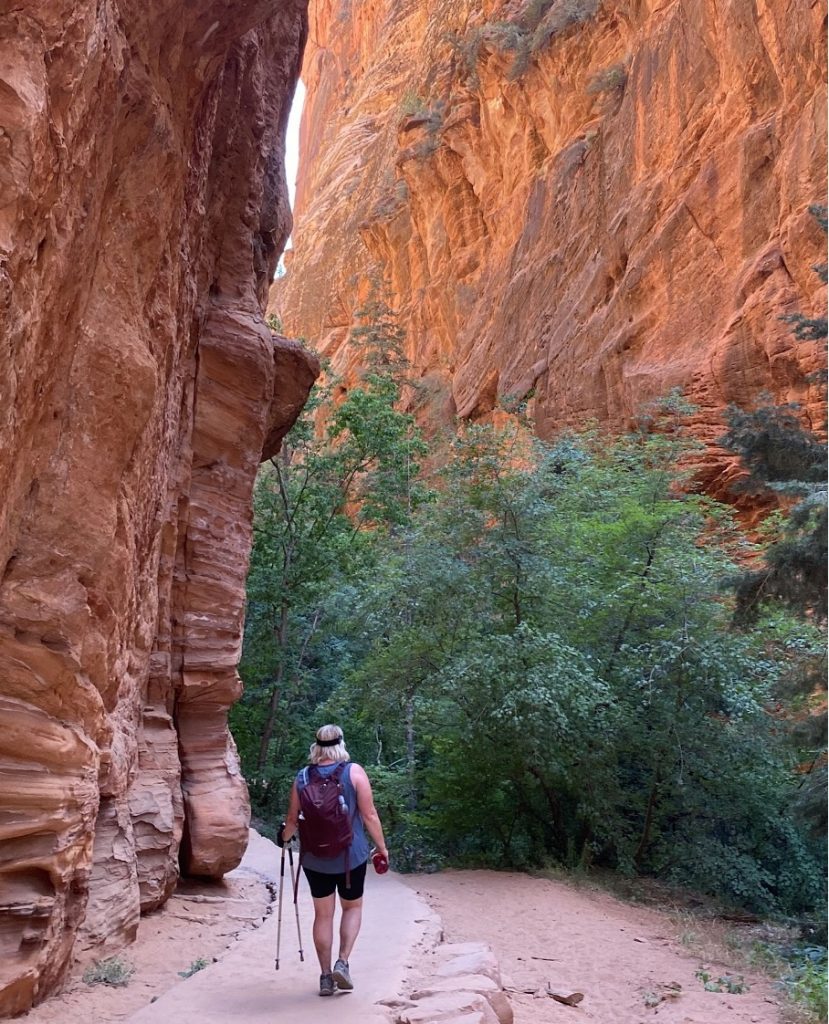
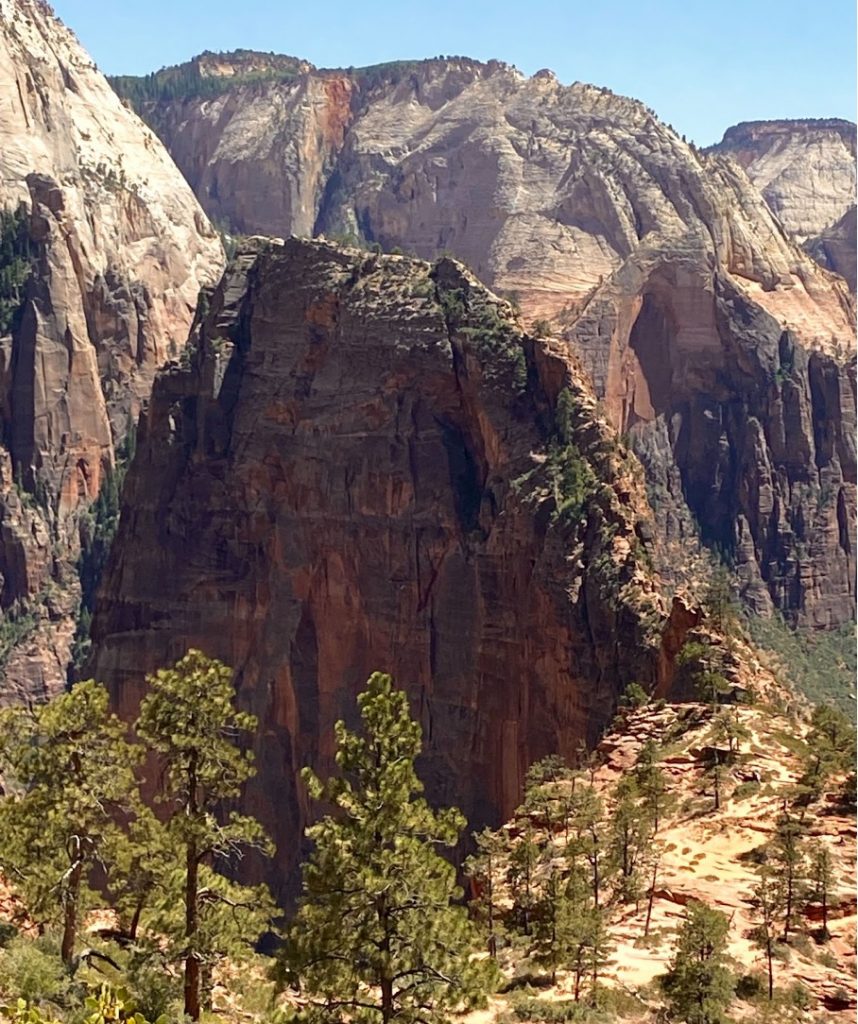
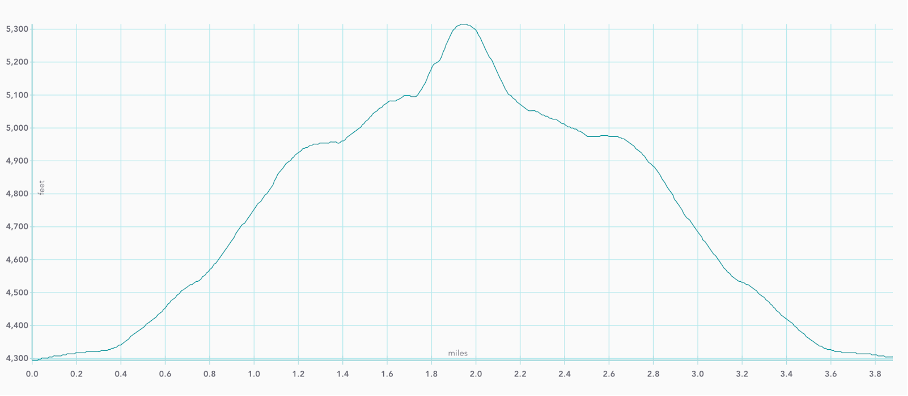
You begin this hike by crossing the Virgin River and climbing the paved path. You can see the monolith of Angel’s Landing before you as you begin your ascent. Furthermore, you get a brief respite from the sun (and the heat if you are hiking in summer) when you enter Refrigerator Canyon. Make sure to whisper if you must talk to not disturb the endangered owls that nest there. After you exit the canyon, the hike gets even steeper as you ascend the 21 switchbacks of Walter’s Wiggles. At the top, you reach the views of Scout’s Landing. At this point, you may continue up the West Rim for more spectacular canyon views or return the way you came. If you were lucky enough to obtain a permit, your journey continues up the chains section to the top of Angel’s Landing. Learn more about the permit process here.
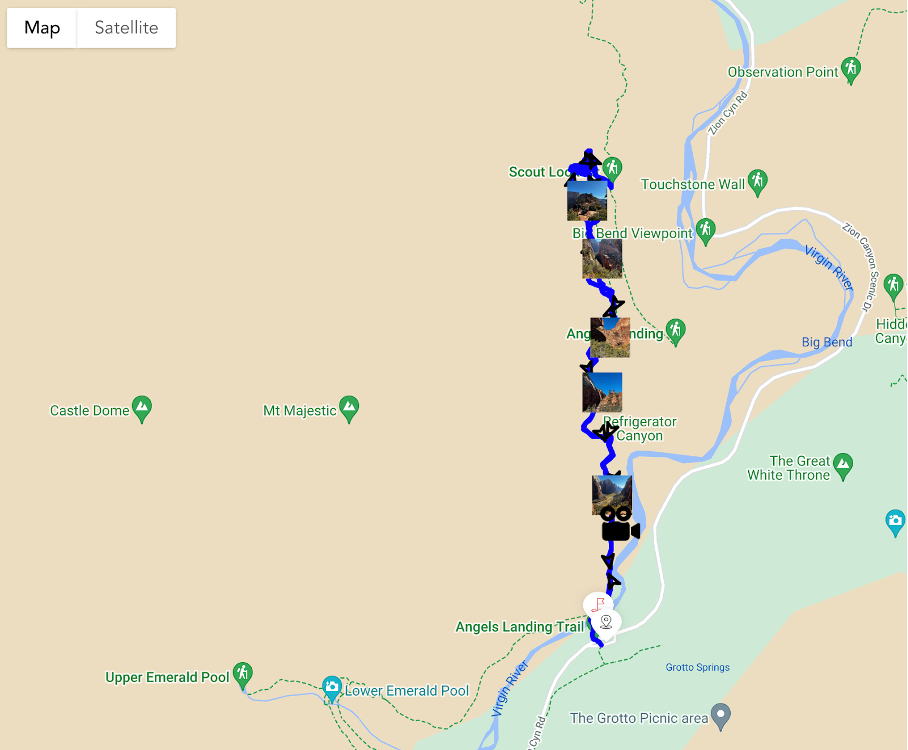
- Trailhead: The Grotto Shuttle Stop
- Distance: 3.9 miles with 1,033 ft elevation gain to Scout’s Landing.Add 0.8 miles round trip and 530 ft elevation gain if you obtain a permit to complete the chains portion of the hike.
- Other Trail Information: Dogs and Drones are not permitted. Bathrooms at the trailhead.
Zion Narrows
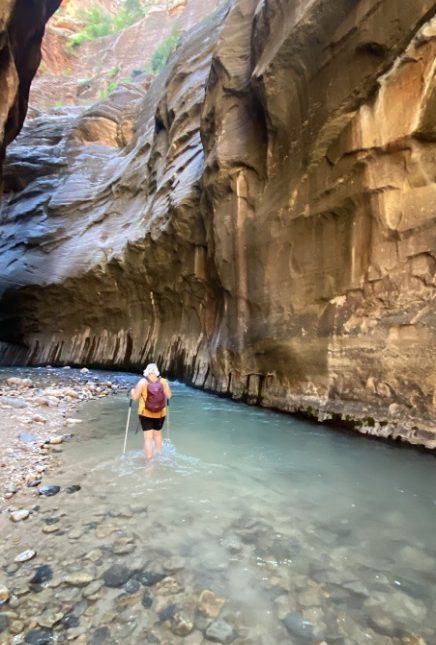
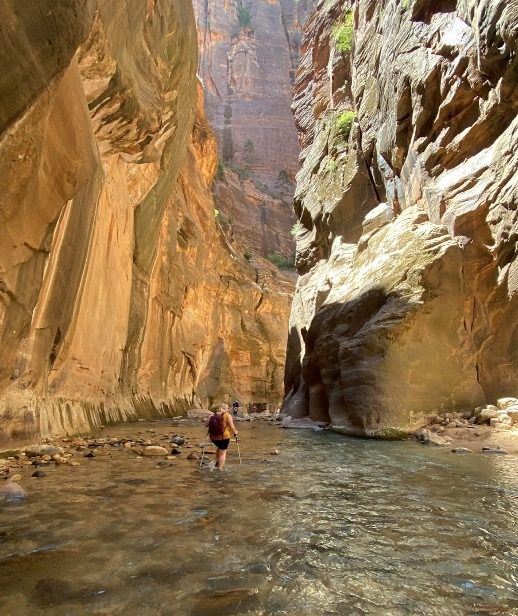
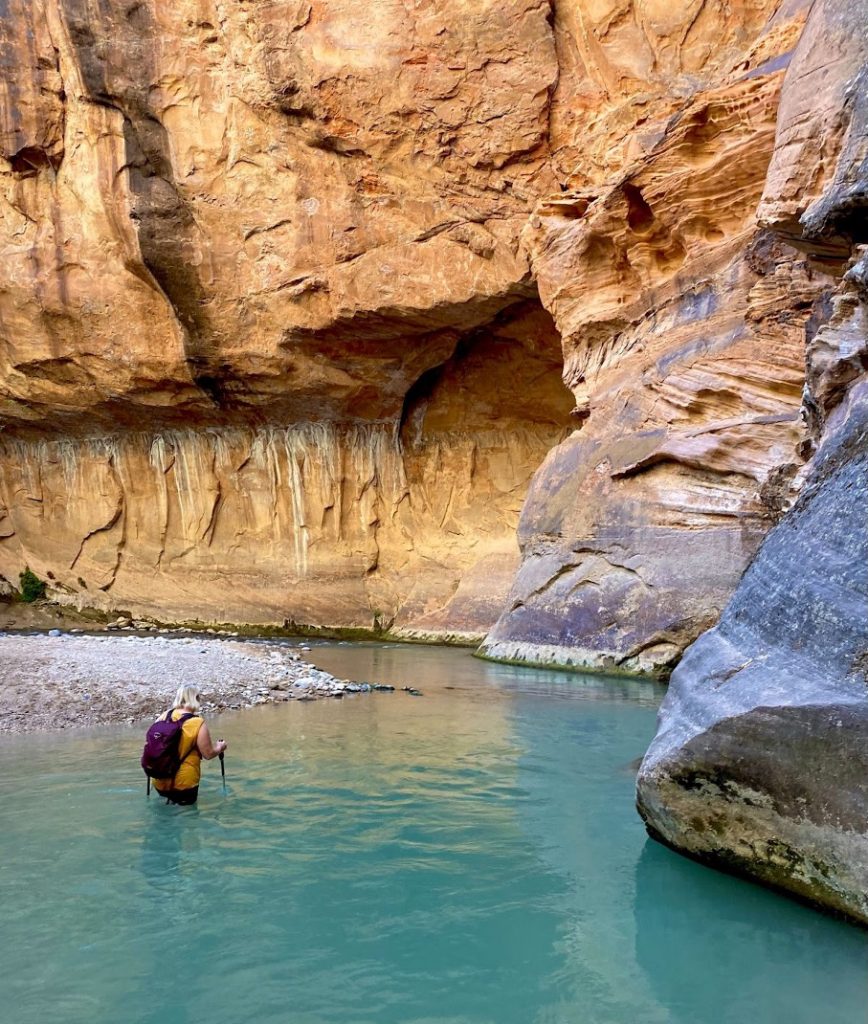
This is my favorite hike in the main canyon of Zion National Park. The rewards-to-effort ratio is high, and it can accommodate every fitness level, as you can hike as far as your energy level permits and turn around. This hike is magical with the running water, the glowing rock walls, and the contrasting blue sky above you. This post only covers the bottom-up portion of the hike.
You begin the hike along the paved Riverside Walk. It follows the Virgin River as the canyon walls gradually get closer together. Once the pavement ends, this is where you enter the water portion of the hike.
At this point, the water levels can vary greatly; sometimes, you can walk on dry ground in places, while in others, you will be hiking in waist-deep or higher water, depending on conditions. Many people aim to hike to the Wall Street portion of the hike, where the canyon walls are a mere 22 feet apart.
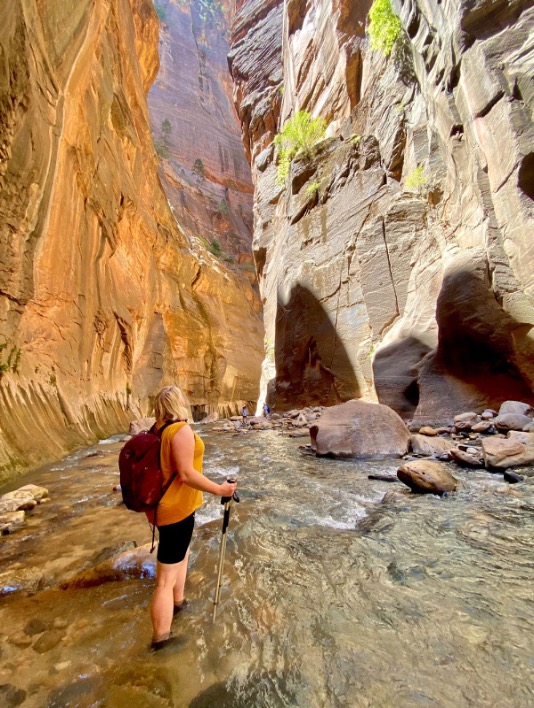
You may hike as far as Big Springs ( about 5 miles), which is the furthest you can hike without a permit. Plan on this hiking taking a full, rewarding day.
Pro tips:
- Make sure you have sturdy hiking shoes or closed-toed hiking sandals that are appropriate for the current conditions.
- You will also need a walking stick or hiking poles in the river bottom.
- It can get chilly in the shady canyon while walking in the cold water. Layers are key.
- There are many outfitters in Springdale that rent equipment needed for current conditions
- Remember, all water hikes have an inherent risk of flash flooding. Know the weather, flash flood prediction, and trail conditions. Most importantly, consult with a local ranger before you go.
- The best months to hike the narrows are September and October, when the flash flood risk is low, and the temperatures are pleasant.
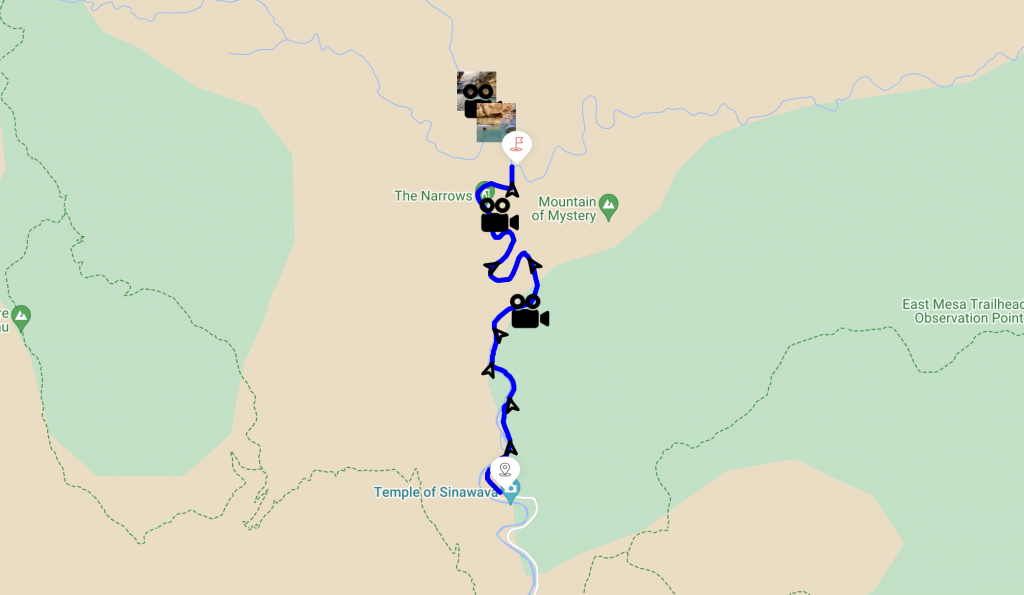

- Trailhead: Temple of Sinawava Shuttle Stop
- Distance: Up to 9.4 miles with 334 ft elevation gain
- Other Trail Information: Dogs and Drones are not permitted. Bathrooms at the trailhead.
The Best Hikes In Bryce Canyon National Park
Navajo and Peekaboo Loops
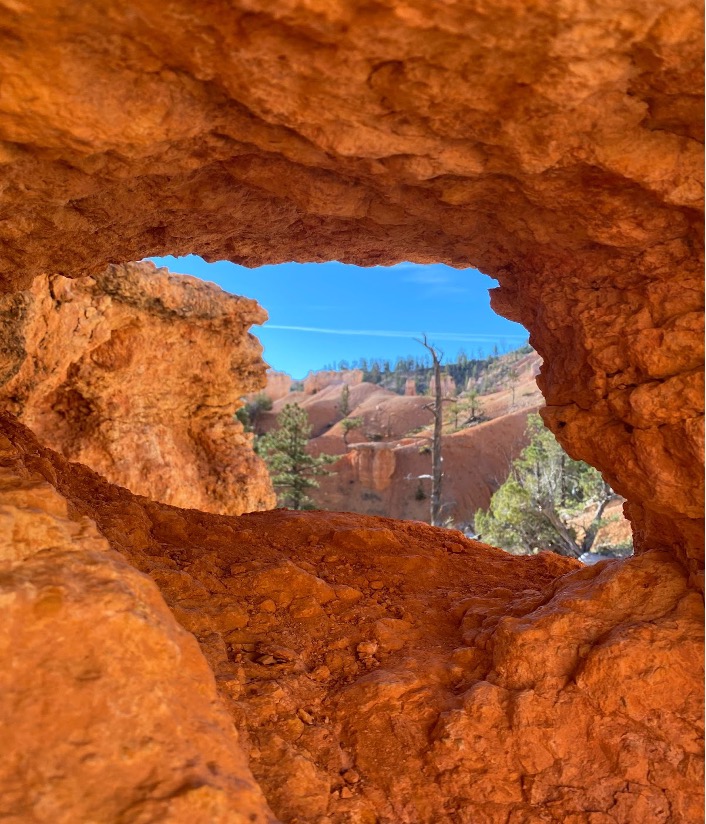
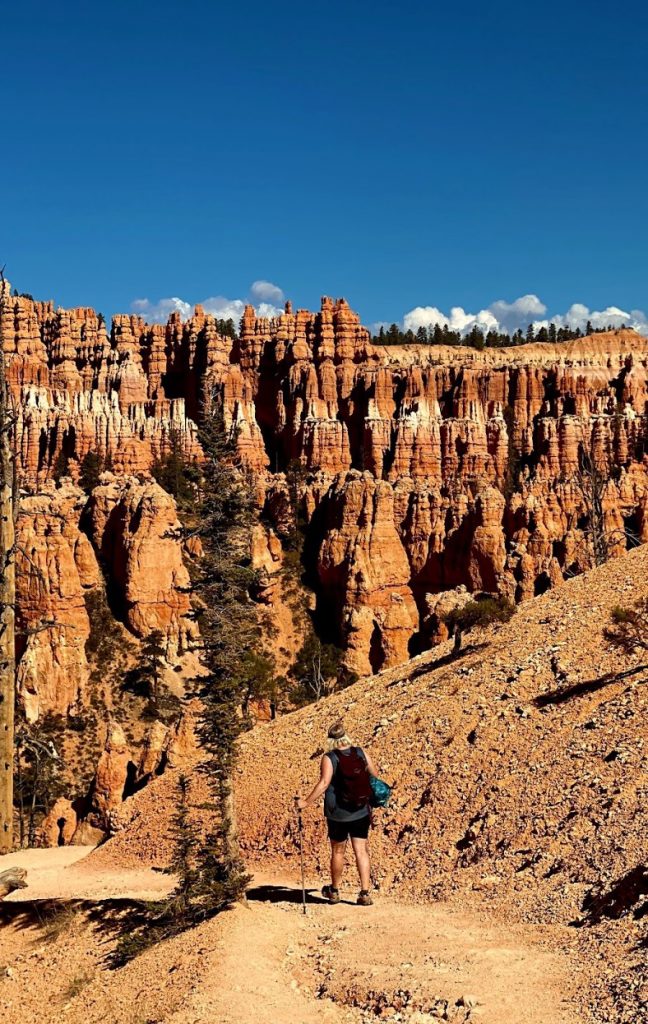
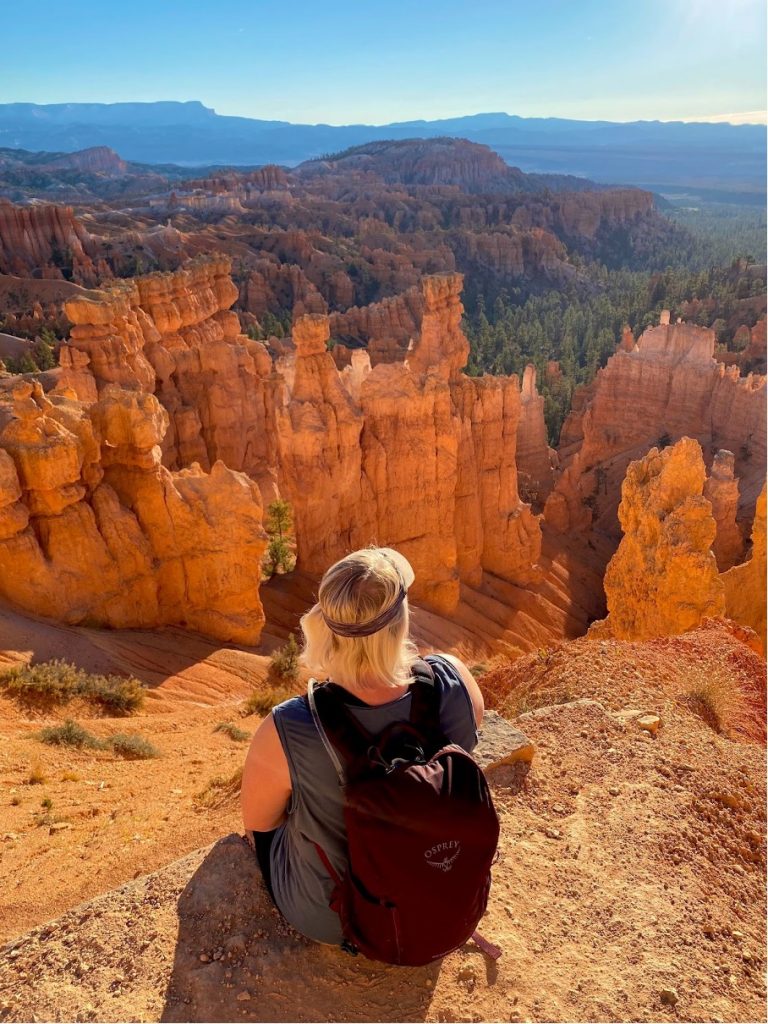
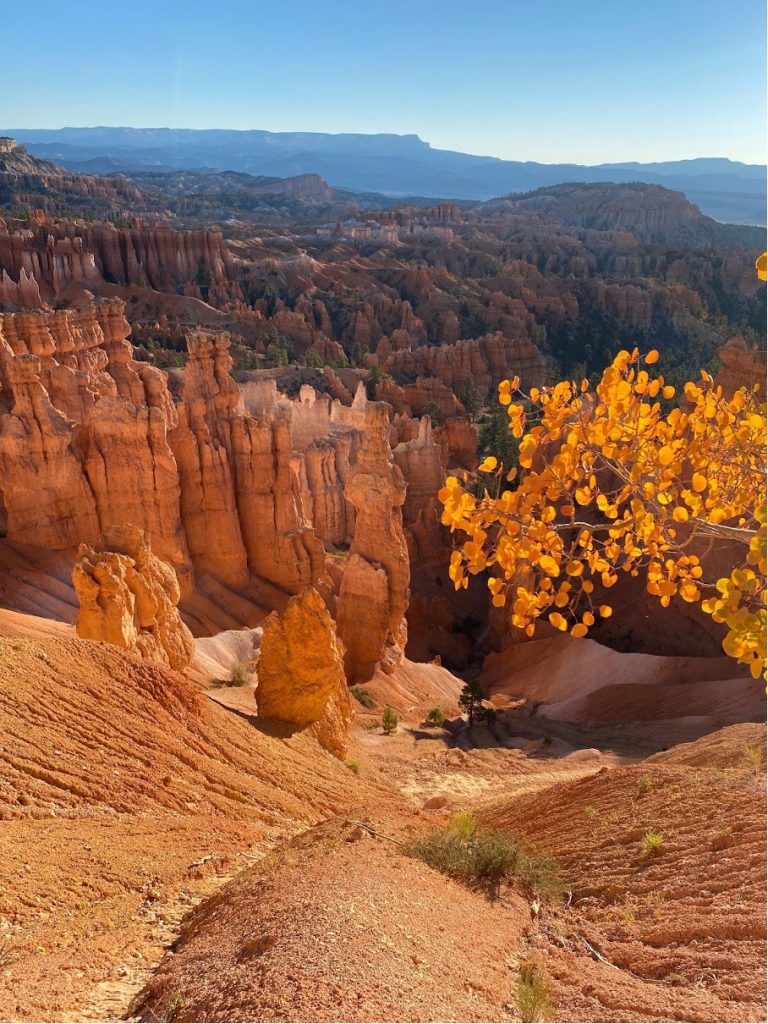
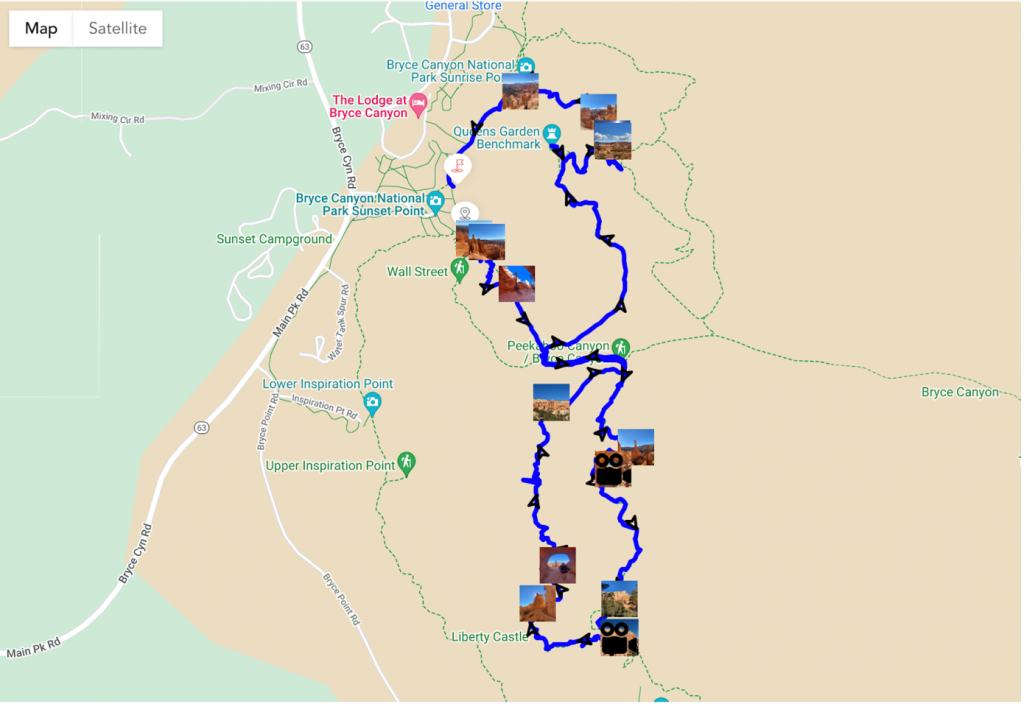
The Navajo and Peekaboo Loops Trail takes you past Thor’s hammer and down the iconic switchbacks. If you can time your hike to begin about an hour after sunrise, you will have a quieter experience, and the canyon walls will glow. It’s mind-blowing. This hike will continue to leave you in awe at every turn as you witness the other-worldly hoodoo, arches, and walk through tunnels that open to fantastic view after fantastic view.
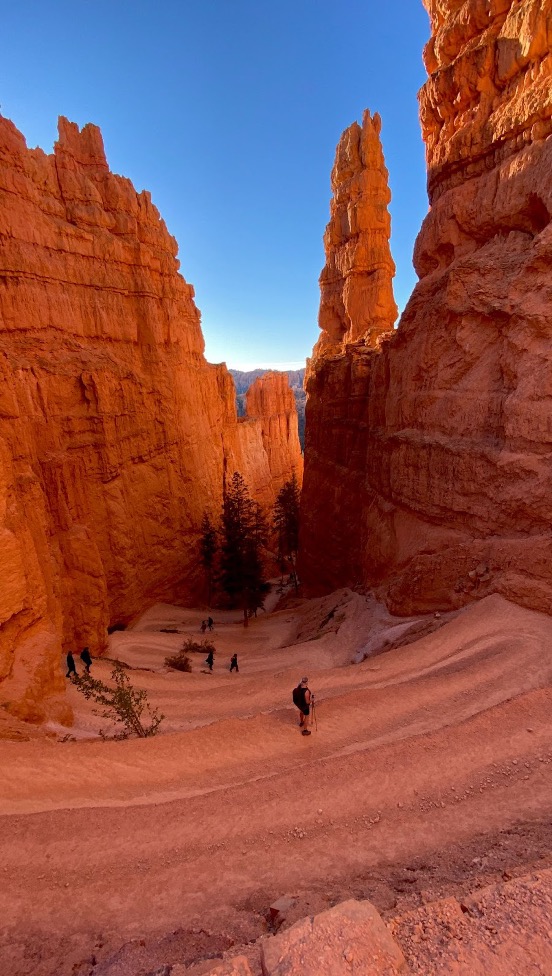
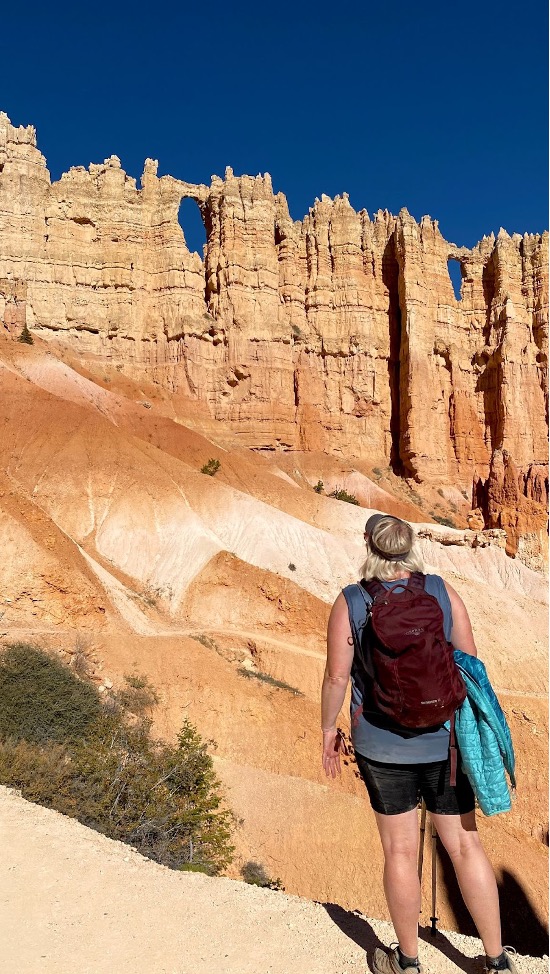
Once you reach the bottom of the canyon, you will cross over to the Peekaboo loop. Additionally, this portion of the hike will take you past the famed Wall of Windows and across the most majestic views of the hoodoo-filled Bryce Amphitheater.
After you complete this loop, you retrace your step across the bottom of the canyon, then head right towards Queen’s Garden, where you’ll pass by the hoodoo named for the profile of Queen Victoria. As you ascend out of the canyon, you pass through more tunnels, and the rock color will change from red to white in a few portions. Once you reach Sunrise Point, you will follow the rim trail back to Sunset Point, enjoying more amphitheater views along the way.
Trailhead: Sunset Point parking area
Distance:
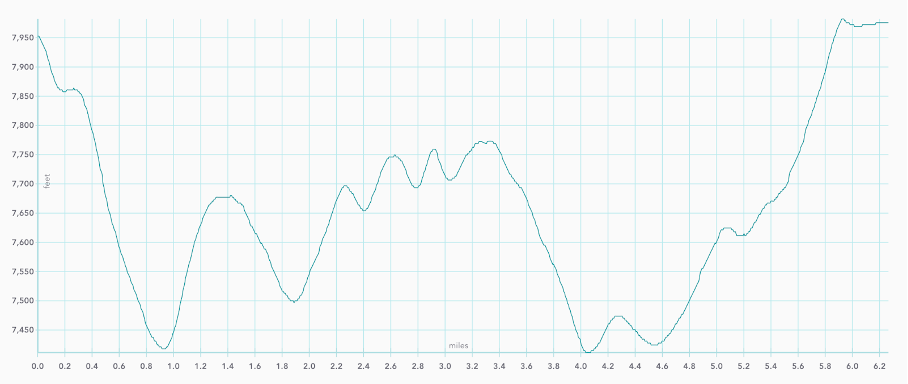
- Navajo Loop Only 1.5 miles with 515 ft. elevation gain
- Peekaboo Loop only 5.2 miles with 1,528 ft elevation gain
- Both (figure 8 loop) 6.3 miles with 1,339 ft. elevation gain.
Other Trail Information: Dogs and Drones are not permitted. Bathrooms at the trailhead.
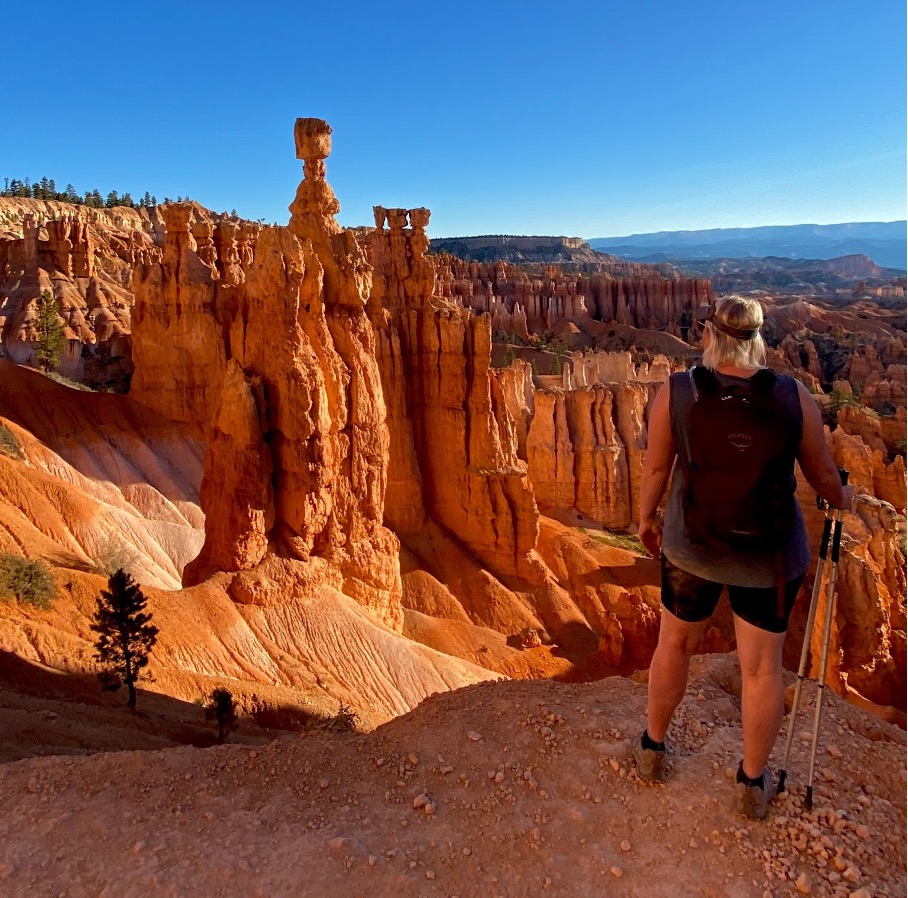
Fairyland Loop
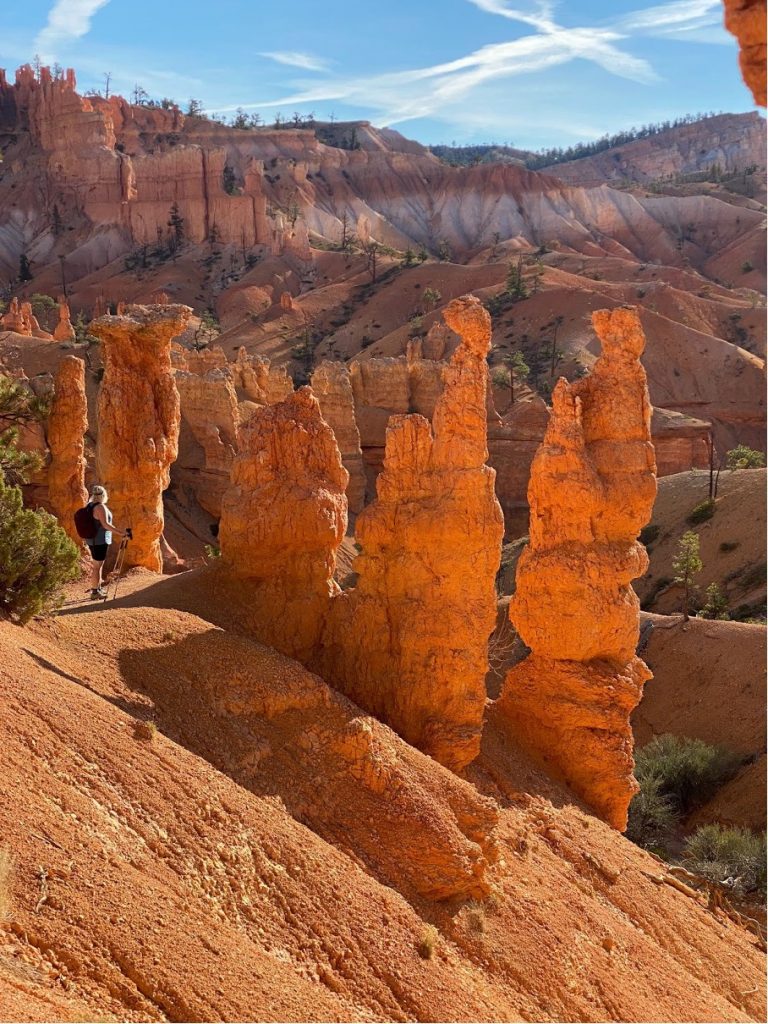
Utah national parks offer a multitude of stunning trails, and one of the most remarkable is the Fairyland Loop Trail. Undoubtedly, if you want all the best that Bryce Canyon National Park offers with a fraction of the crowds, then the Fairyland Loop trail is for you.This trail will delight the senses as you walk among the hoodoos and then climb to view the hoodoos from above in two different valleys.
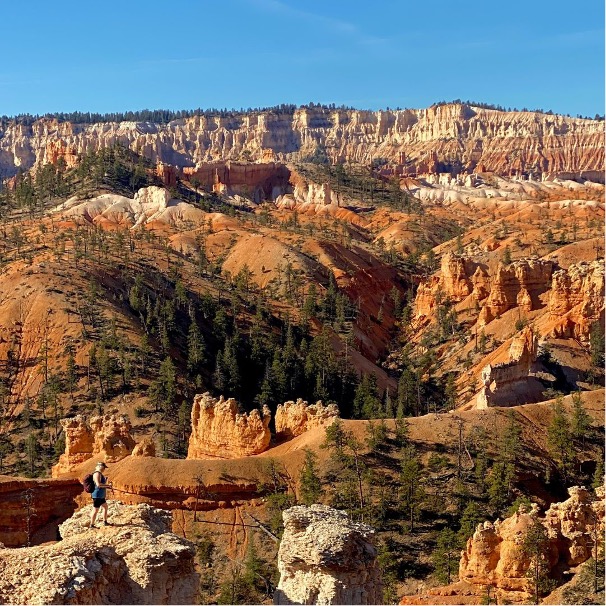
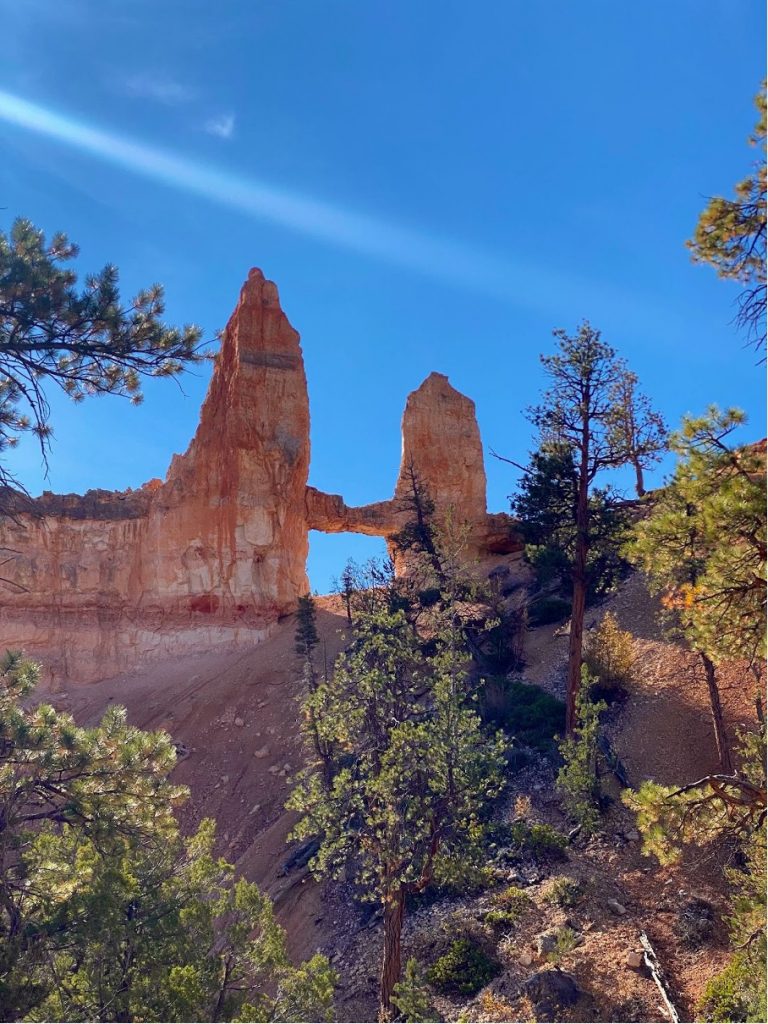
The variety of these fascinating formations will make you want to stop and ponder the forces that led to their creation. Be sure to take the short spur the see the Tower Bridge Arch, so named because it resembles the London Bridge.
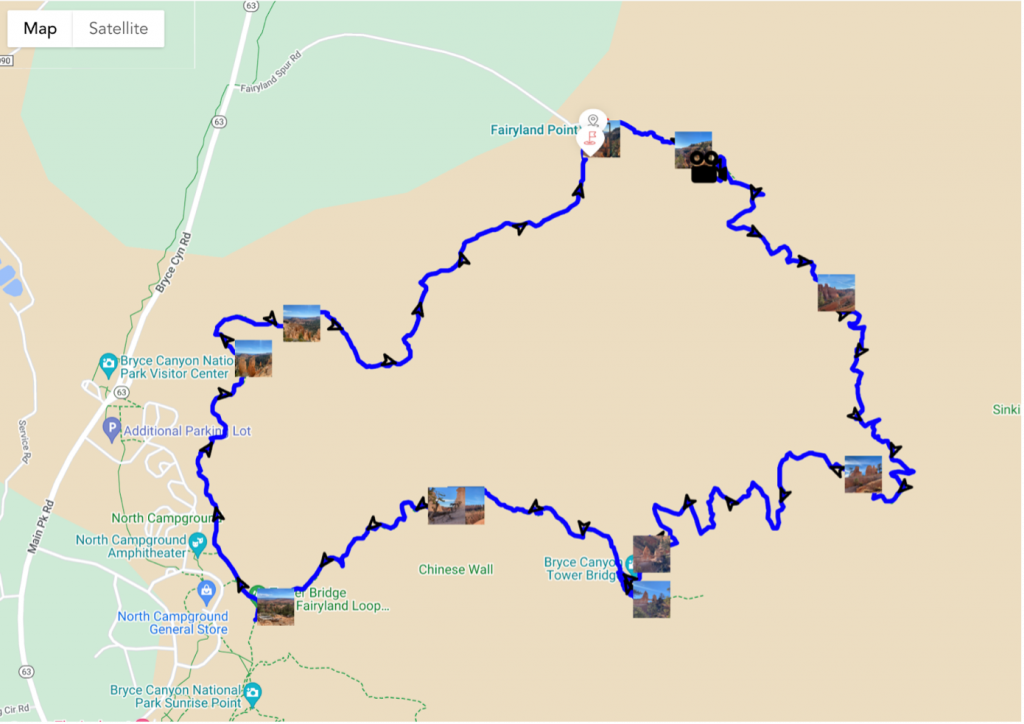
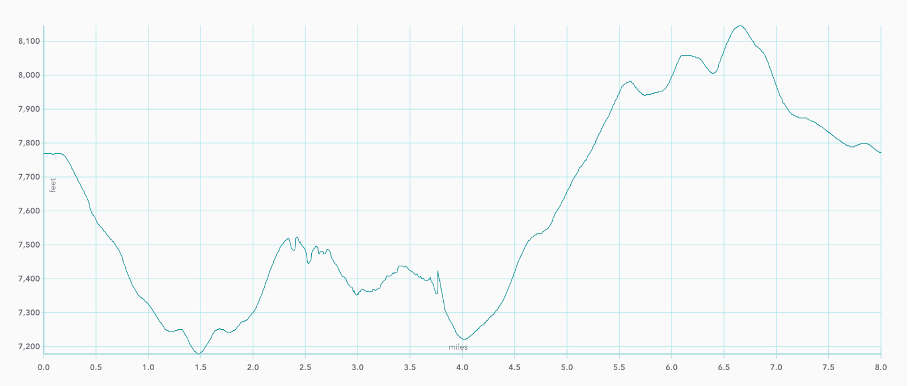
- Trailhead: Fairyland Point Parking Area. You can hike the loop either clockwise or counterclockwise.
- Distance: 7.2 miles with 1,388 ft. elevation gain. Moderate
- Other Trail Information: Dogs and Drones are not permitted. Bathrooms at the trailhead.
The Best Hikes in Arches National Park
Delicate Arch Trail
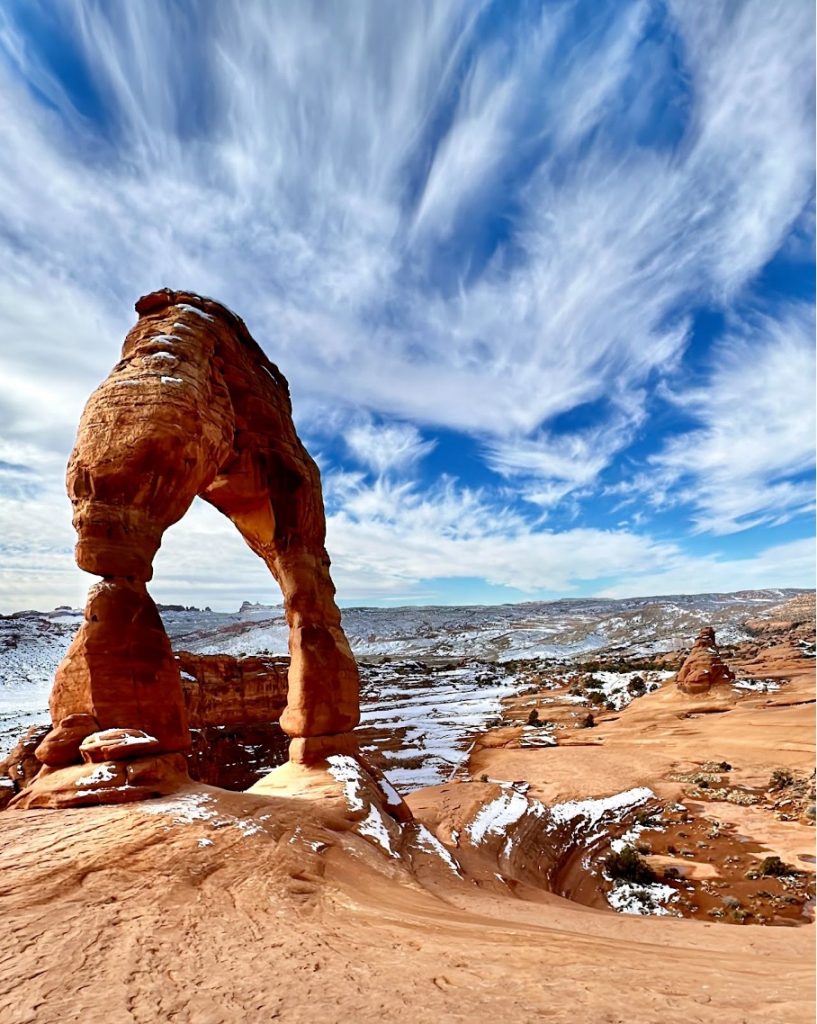
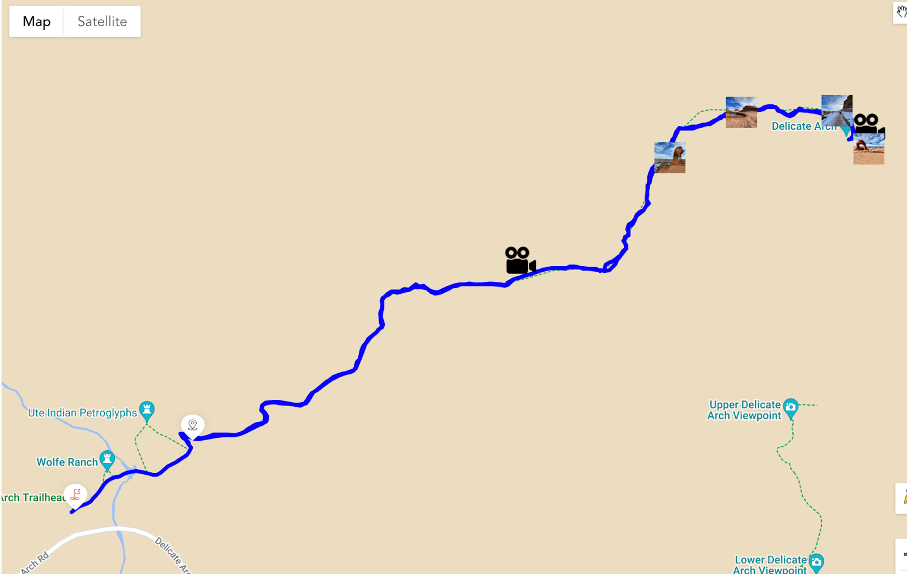
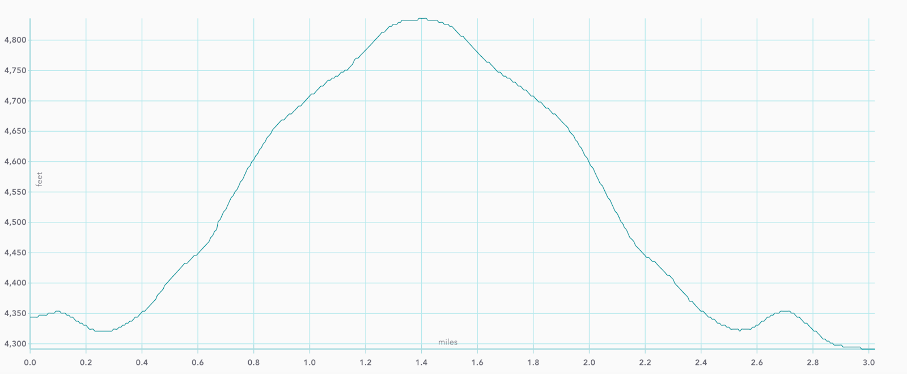
One of the most famous geological features in the world, a hike to Delicate Arch is not to be missed. While this hike is always busy, especially at sunset, you can find some solitude if you go early. The trail begins at Wolfe Ranch. Take a moment to see the ruins and Ute Indian Petroglyphs before beginning the ascent over the sandstone hill. The trail can be hard to follow so follow the cairns (rock stacks), and rest assured the Duoveo app will alert you if you get off track. Once you top the hill, the trail levels out, and you will see some red rock domes.
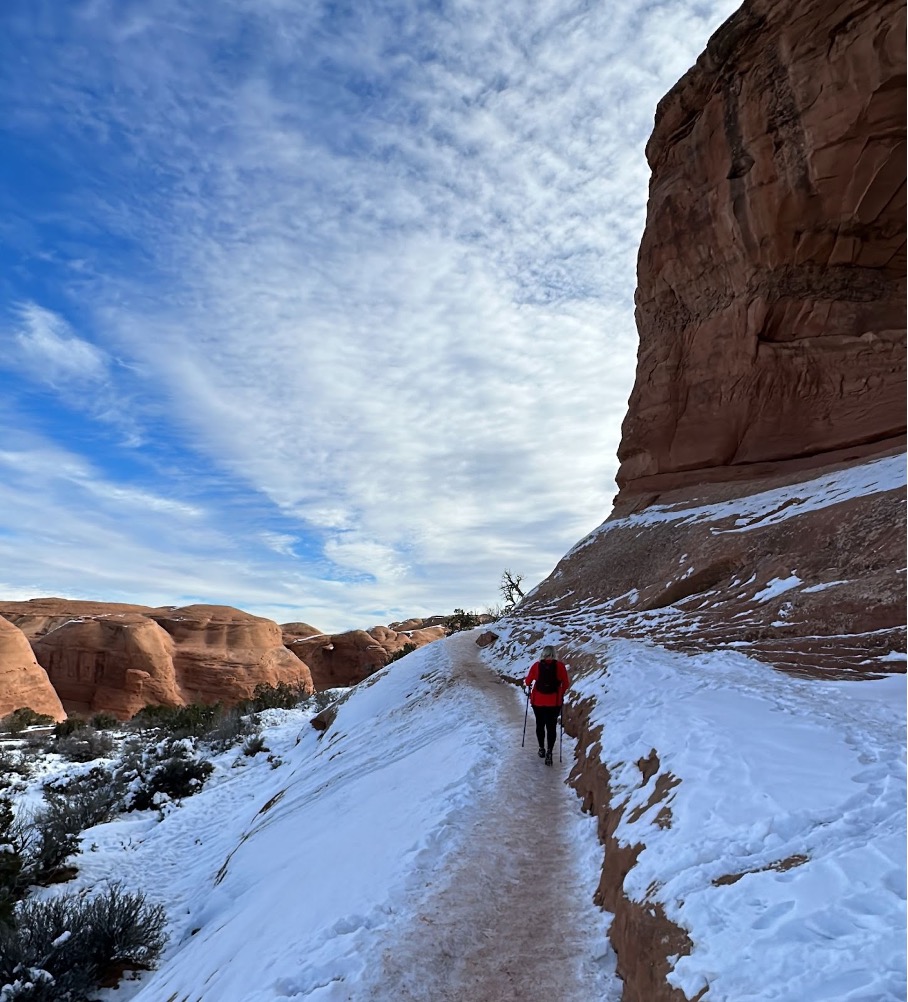
Continue up the path following the cairns. The last stretch of the trail hugs the cliff with some drop-offs, so watch your footing. Along this stretch, you’ll pass by the Twisted Doughnut Arch, which perfectly frames a view of Delicate Arch and the bowl below. At the top of this final stretch, you’ll come around the bend to be greeted with views of Delicate Arch. Take plenty of time to enjoy the scene (and maybe get a picture standing under the Arch, You earned it!)
- Trailhead: Delicate Arch Trailhead
- Distance: 3 miles with 558 ft. elevation gain. Moderate
- Other Trail Information: Dogs and Drones are not permitted. Bathrooms at the trailhead.
Devil's Garden
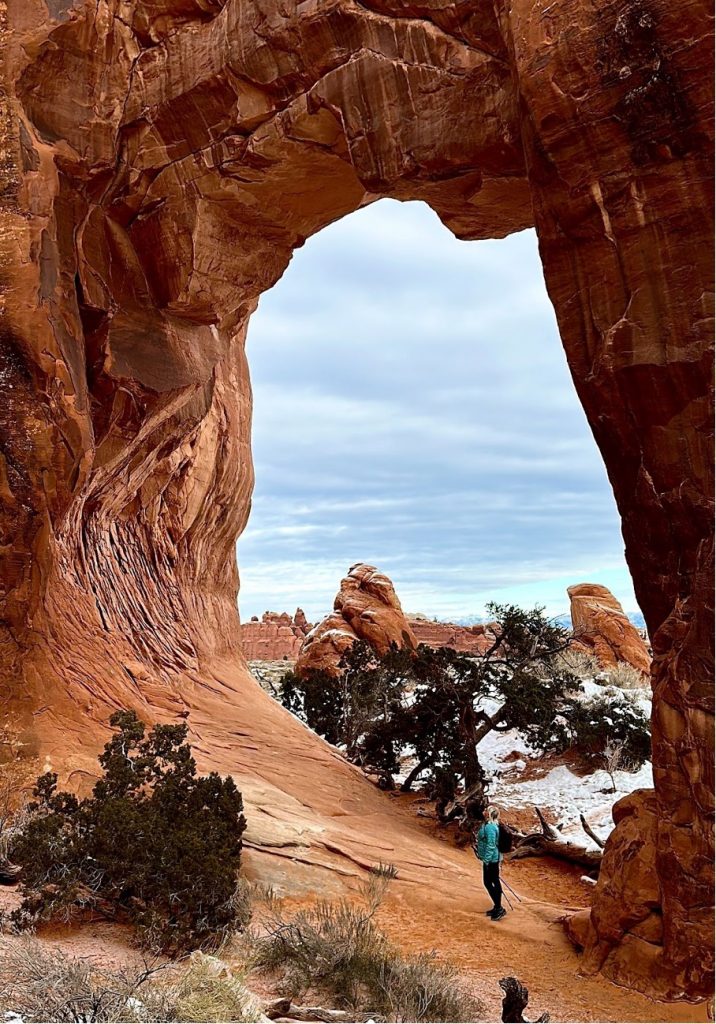
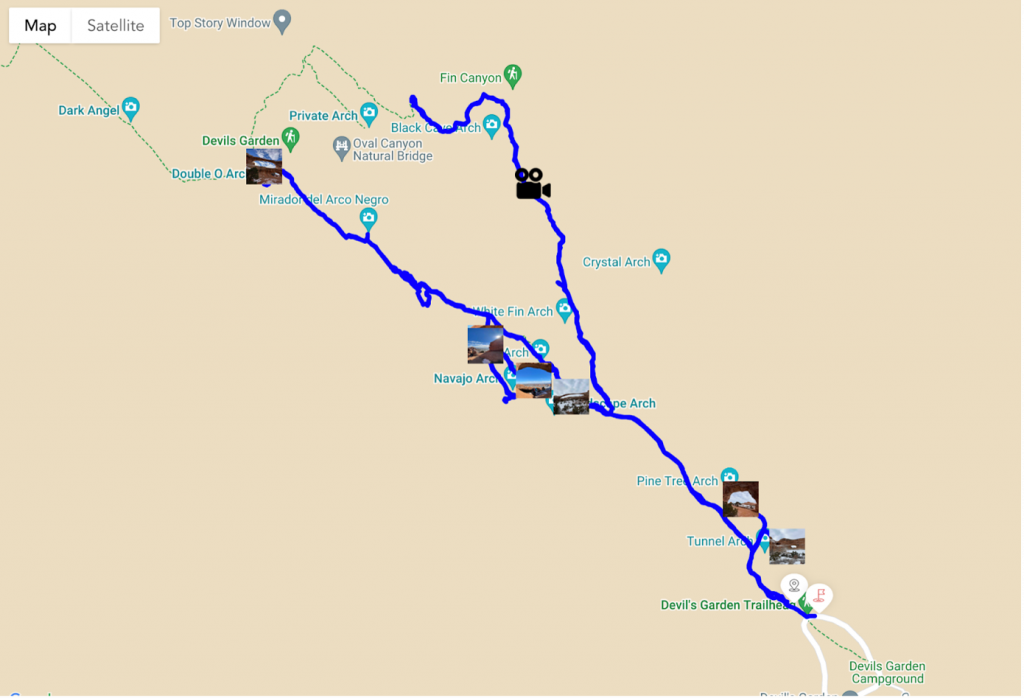
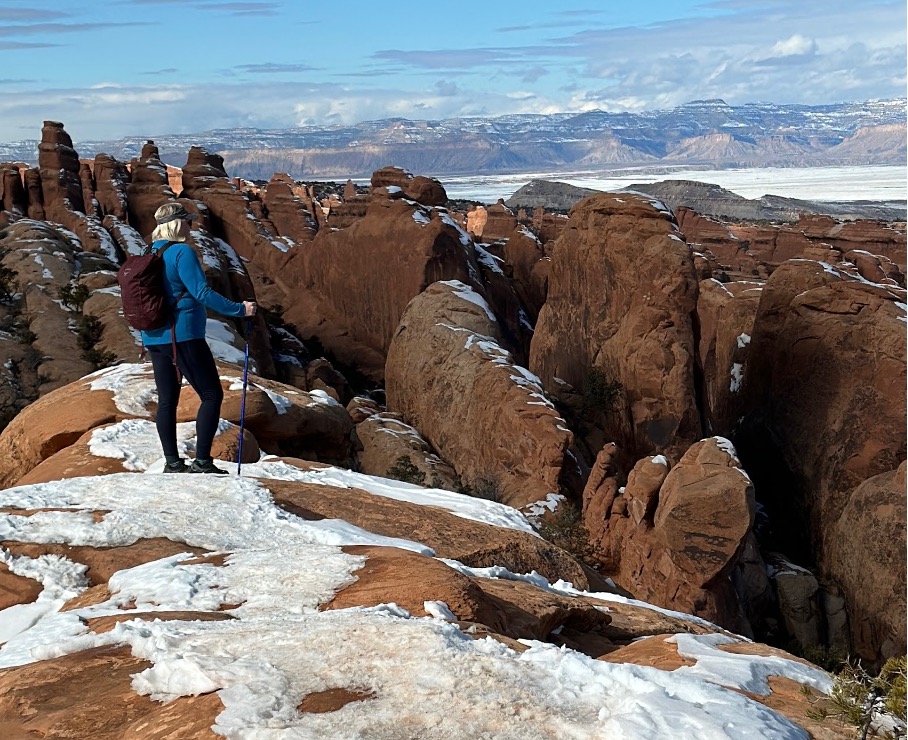
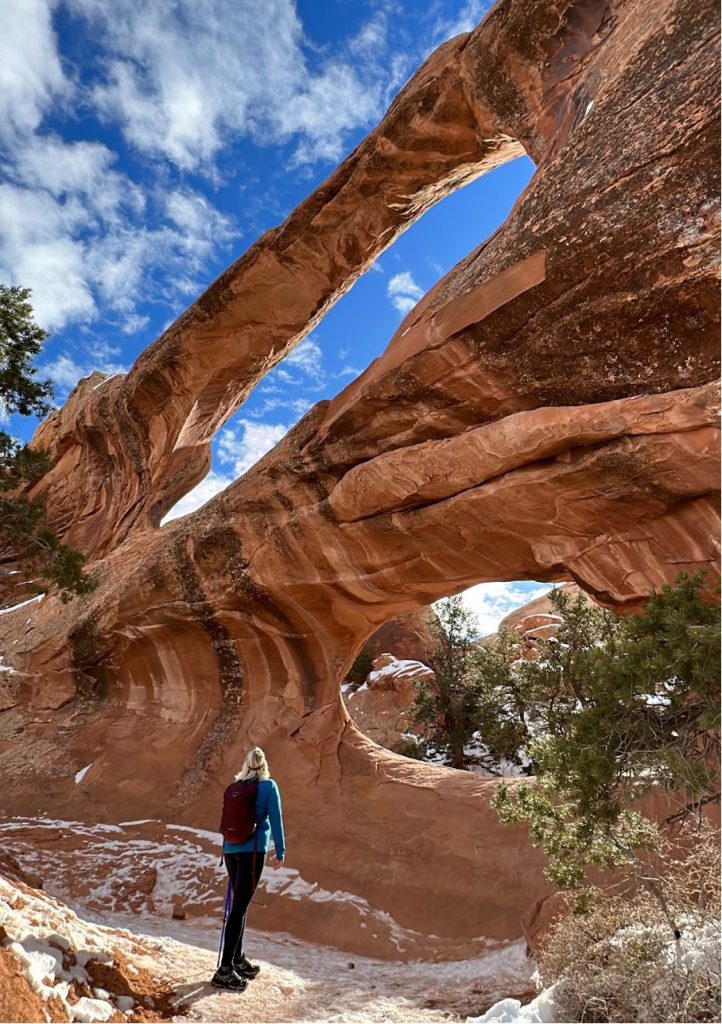
Devil’s Garden and the Primitive Loop is my favorite hike in Arches National Park. It’s also the trail where you are most likely to find the most solitude (along the primitive portion of the trail.) With eight arches, panoramic views, rock spires, fins, and slick rock scrambles, the Devil’s Garden creates a loop hike with a little bit of everything.
It’s an adventure requiring more advanced hiking skills and the ability to scramble up and down some steep sandstone pitches. Nevertheless, if this sounds like more of an adventure than you are looking for, you can still hike to see the Iconic Landscape Arch. It’s only 1.6 miles round trip and family-friendly. Make sure to take the detours to Pine and Tunnel Arches for only an additional 0.5 miles.
- Trailhead: Devil’s Graden Trailhead
- Distance: 7.9 miles with 1,085 ft. elevation gain Hard
- Other Trail Information: Dogs and Drones are not permitted. Bathrooms at the trailhead.
The Best Hikes in Canyonlands National Park
Elephant and Big Spring Canyons
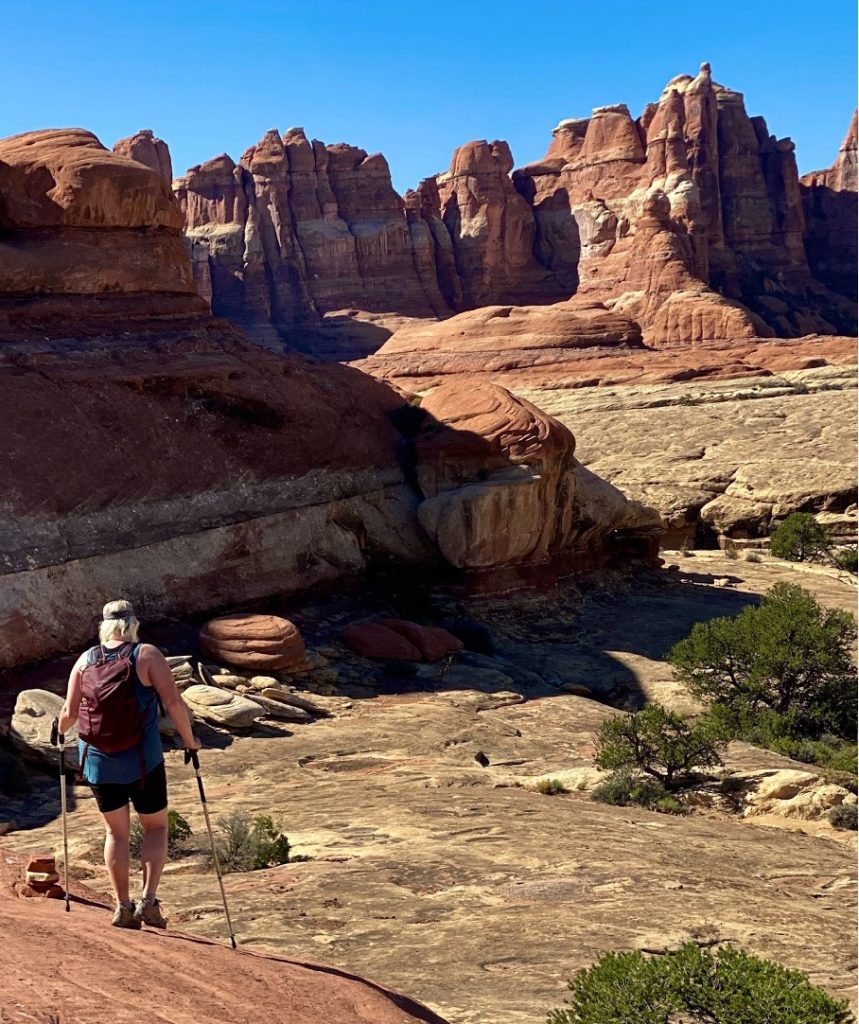
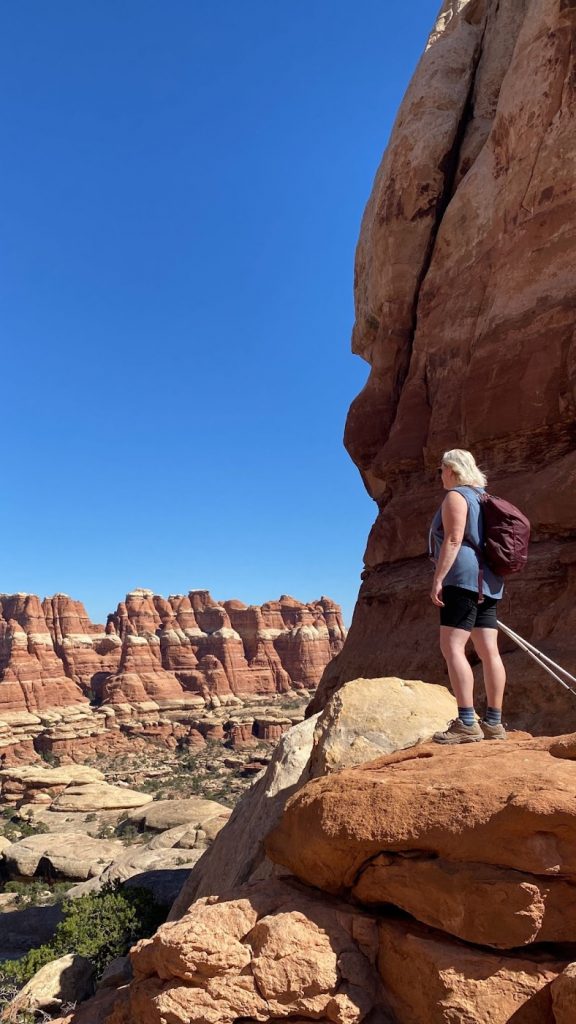
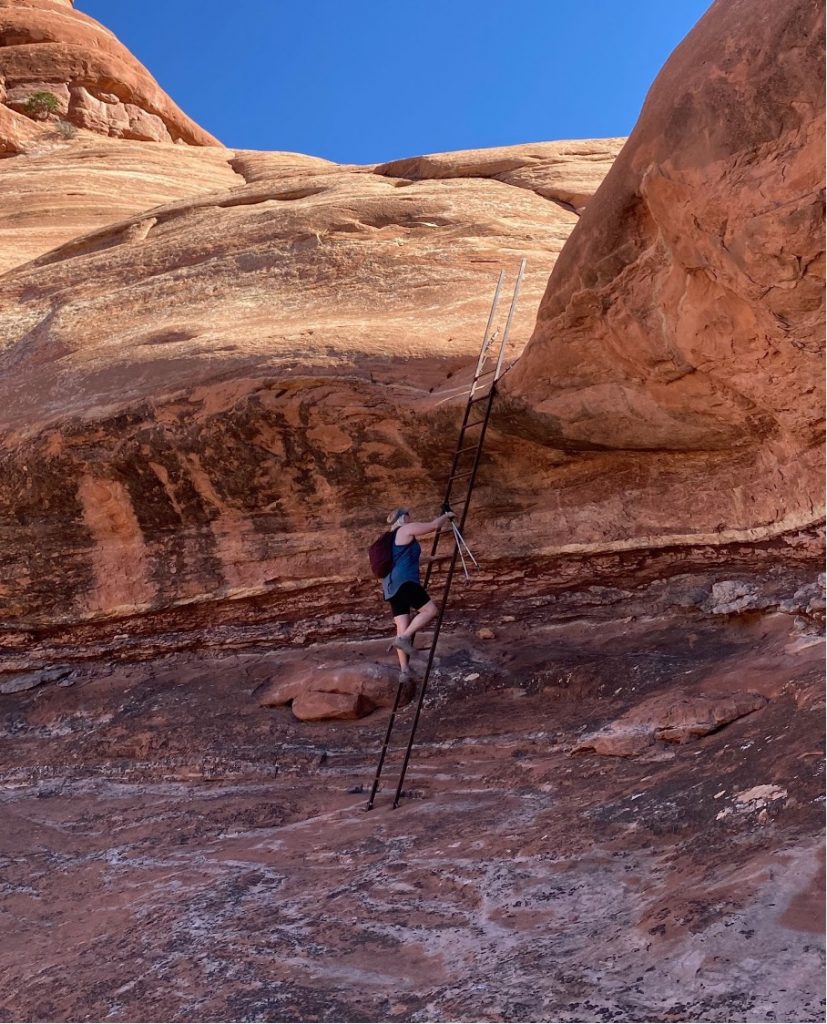
Utah national parks hold a treasure trove of remarkable hikes, and if you’re an adventure lover, then the Elephant and Big Spring Canyons Loop is tailor-made for you. Undeniably, during this loop hike, you’ll balance on narrow logs, climb tall ladders between canyons, climb moki steps (footholds carved into the rock), then scramble and hike narrow trail points with some exposure. All this will gain you narrow slot sections, epic views, rock spires, and awe-inspiring canyon views with none of the people. This is a hike you’ll want to follow the Duoveo map.
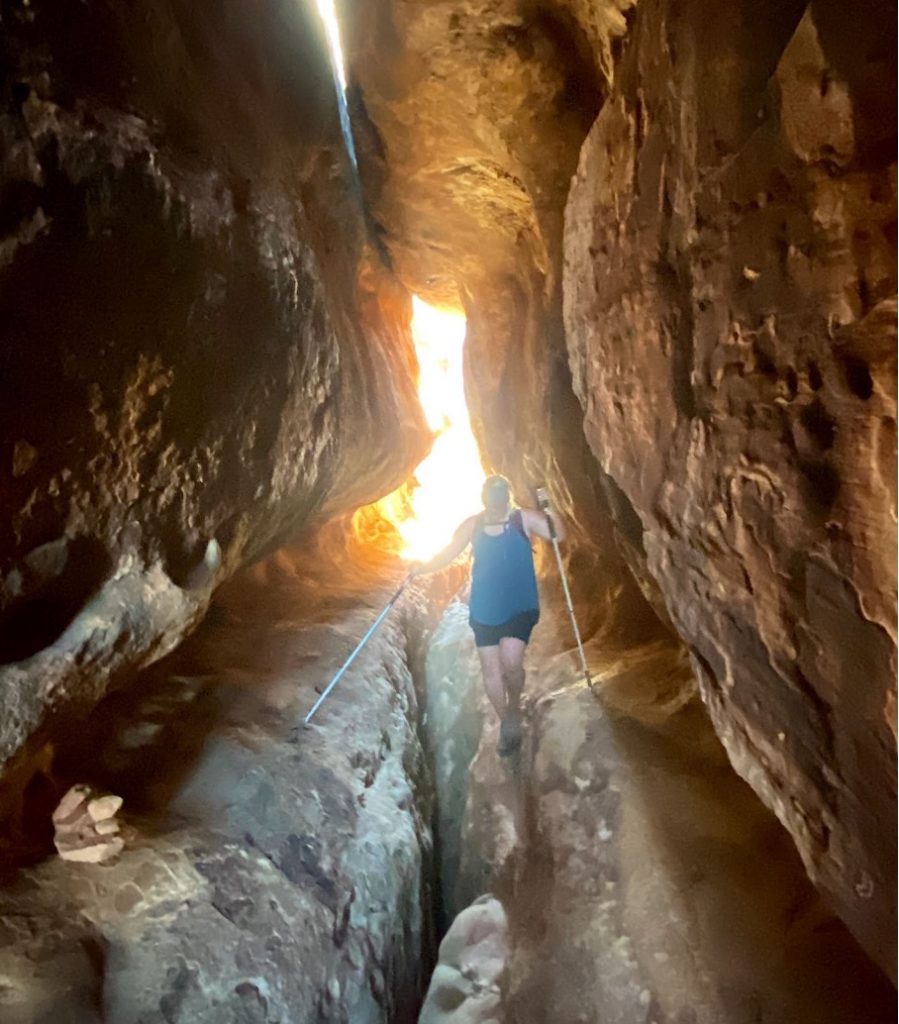
The trail starts at the Squaw Flats Trailhead and climbs Big Spring Canyon. Along the way, you will pass by several impressive rock formations and a slot-like section. After reaching the top of Big Spring Canyon, the trail descends into Elephant Canyon. The trail then climbs back up to the mesa top, following the mesa’s rim for a while. From here, you can enjoy panoramic views of the surrounding canyons and buttes.
Next, you’ll climb up and down two ladders between Big Spring and Elephant Canyons. After the slick rock mesa views, you’ll come to a log which you climb and pass through a narrow slot.
Continue to follow the cairns up and over the next mesa where the trail descends into Squaw Canyon. Here, you follow a stream bed with more vegetation past some campsites. Continue to follow the trail until you reach the trailhead.
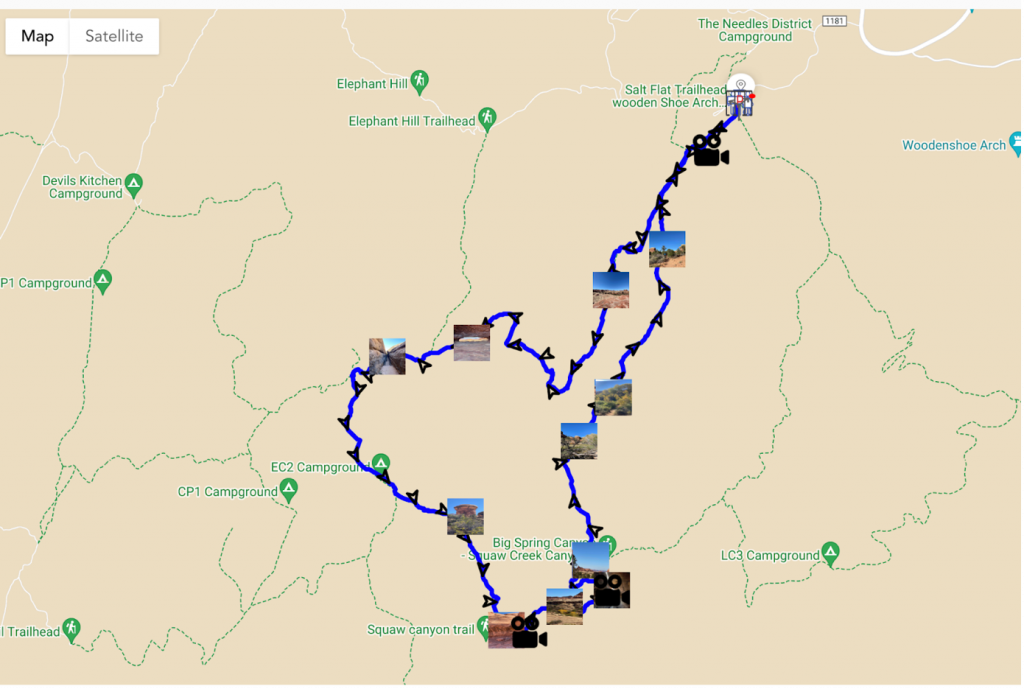
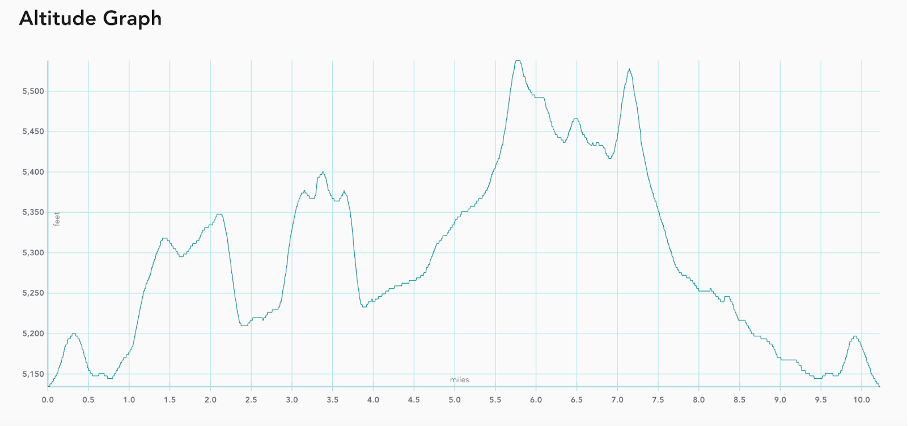
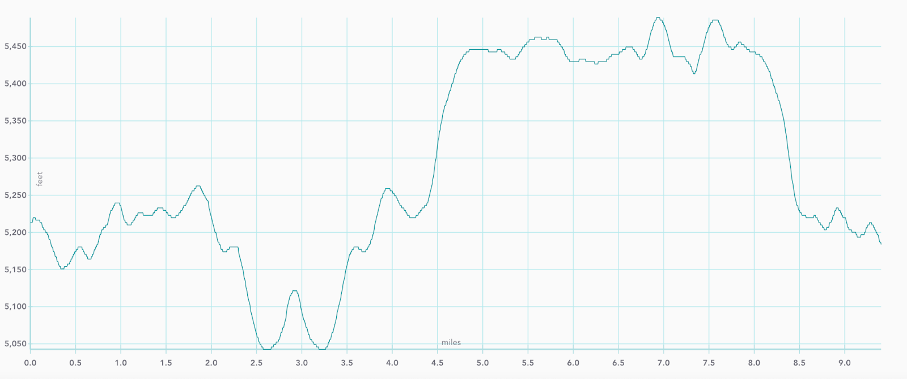
- Trailhead: Salt Flat Trailhead in the Needles District Campground
- Distance: 10.2 miles with 1,030 feet elevation gain
- Other Trail Information: Dogs and Drones are not permitted. Bathrooms and water at the trailhead.
Elephant Hill to Chesler Park
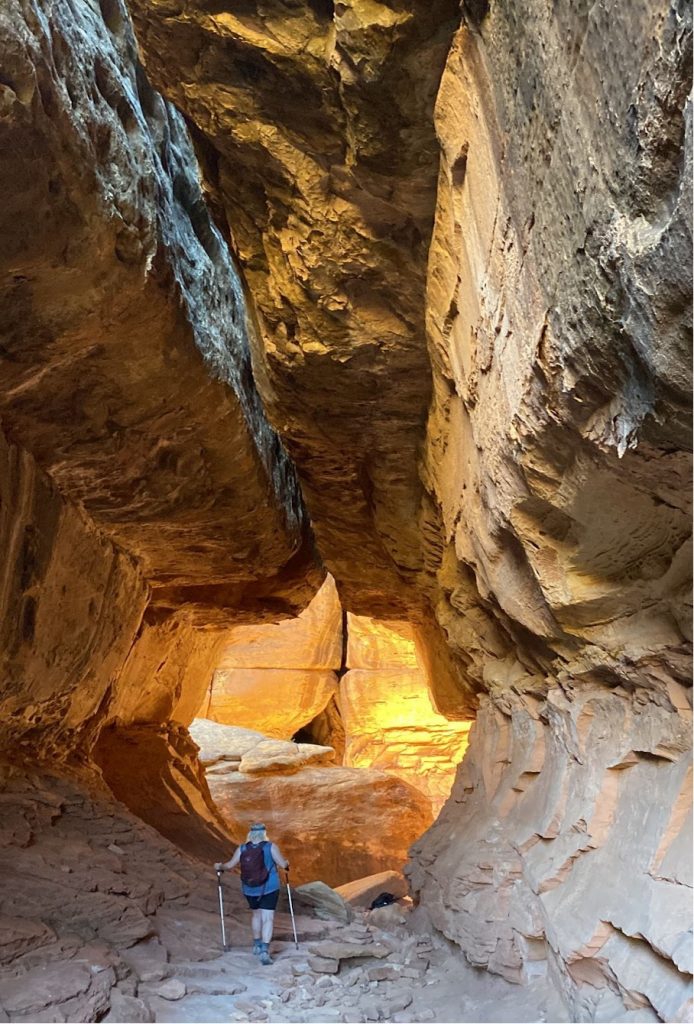
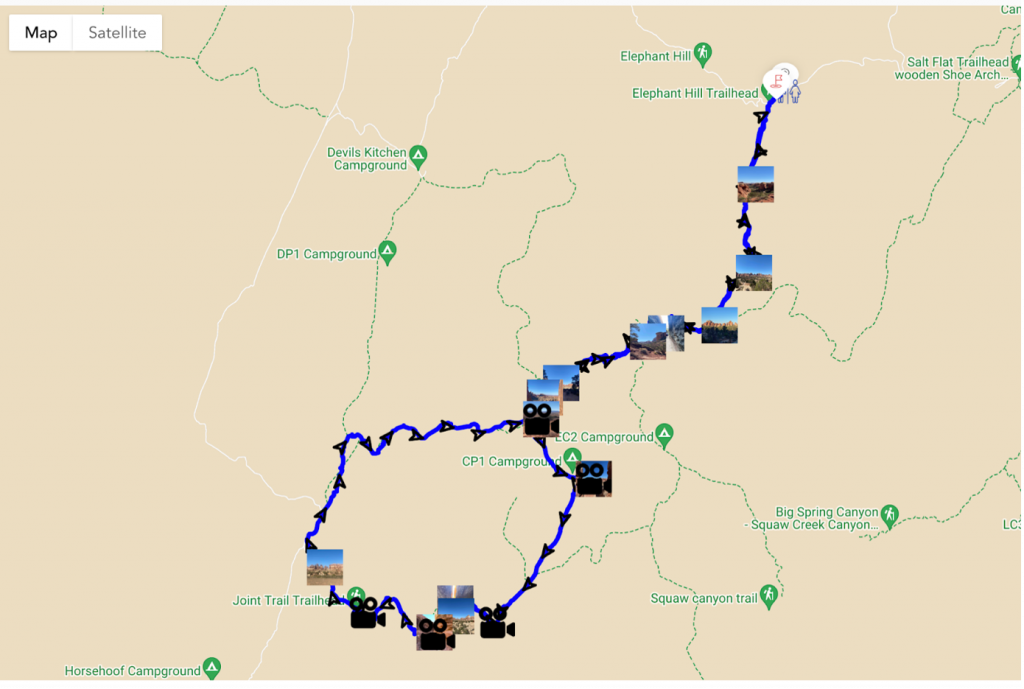
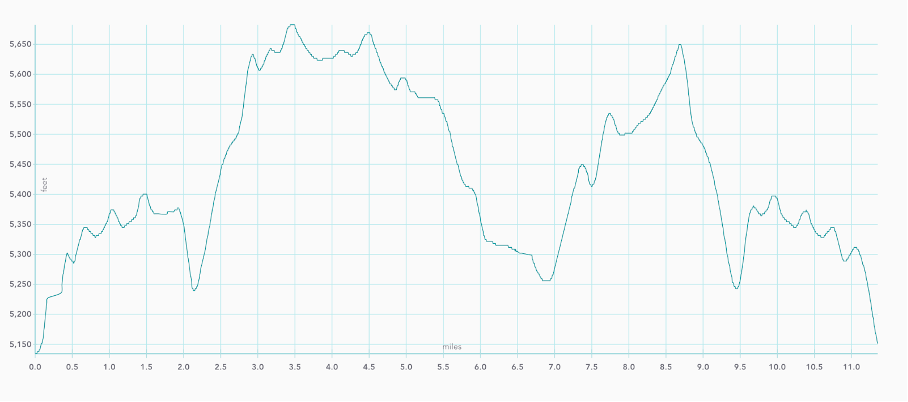
The Chesler Park Loop Trail is a stunning adventure through the towering spires and unique rock formations of the Needles district of Canyonlands National Park. You begin the trail with a steep stair climb. As the trail continues to climb, you’ll be treated to views of the unique formations of this region. Next, you begin the first descent through a short slot and then across Elephant Canyon. As you begin to climb up out of the canyon you’ll be treated to more sweeping views. After some easy scrambling, you’ll reach the Chesler Park Viewpoint at about 3 miles. Make sure to look back at the views of the needles and the La Sal Mountains in the distance. From there, you will begin your descent into Chelser Park.
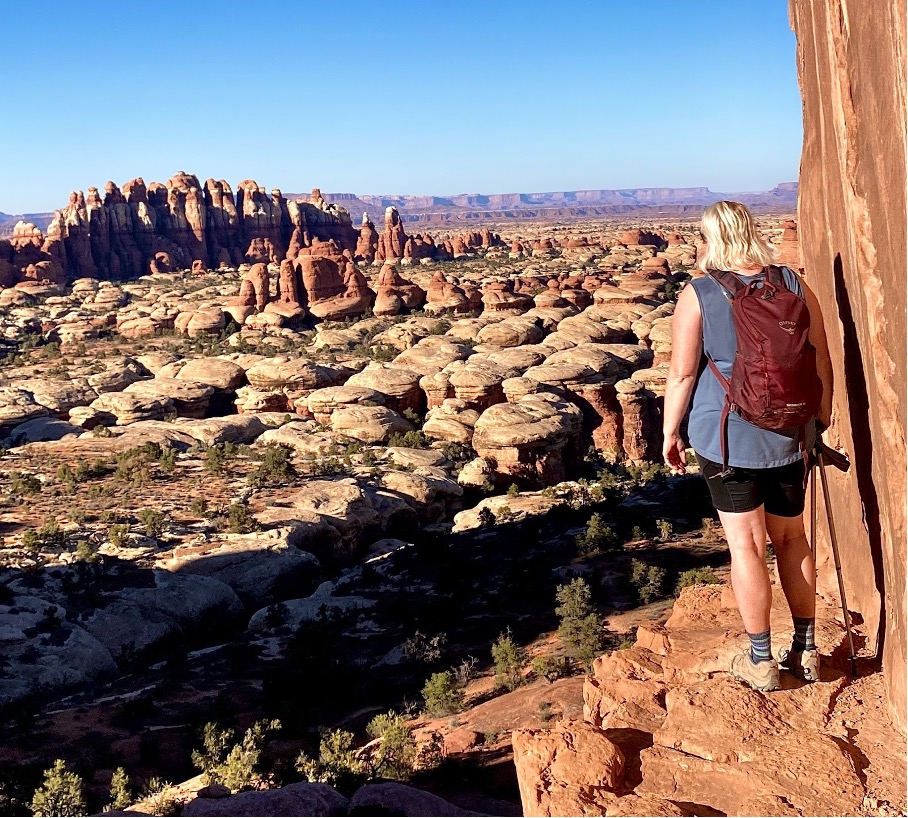
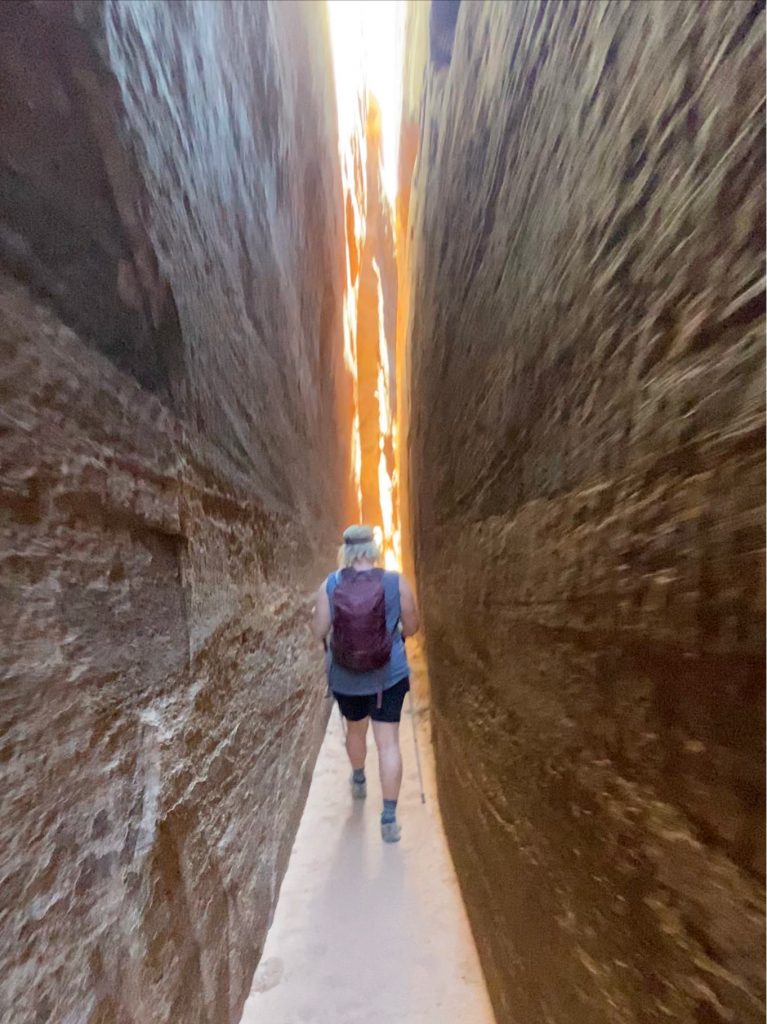
When you reach the fork in the trail, you can approach the loop from either direction, but we prefer counter-clockwise (take the right fork). Follow this trail up and down along the needles until it reaches a jeep road. Turn left and follow the jeep road for 0.5 miles. This is the Joint trailhead.
The Joint will take you through more spires, up some narrow stairs, and into a cave. Once through the cave, you’ll walk through the narrow “joint,” which is like a slot with some fun obstacles to navigate. After you climb out of the joint, you’ll rejoin the Chesler Park Loop. This primarily flat section will walk you past more needles. Retrace your steps to the Elephant Hill Trailhead when you reach the trail junction.
- Trailhead: Elephant Hill Trailhead
- Distance: 11.4 miles with 1,594 feet elevation gain
- Other Trail Information: Dogs and Drones are not permitted. Bathrooms and Water at the trailhead.
The Best Hikes in Capitol Reef National Park
Cassidy Arch Trail
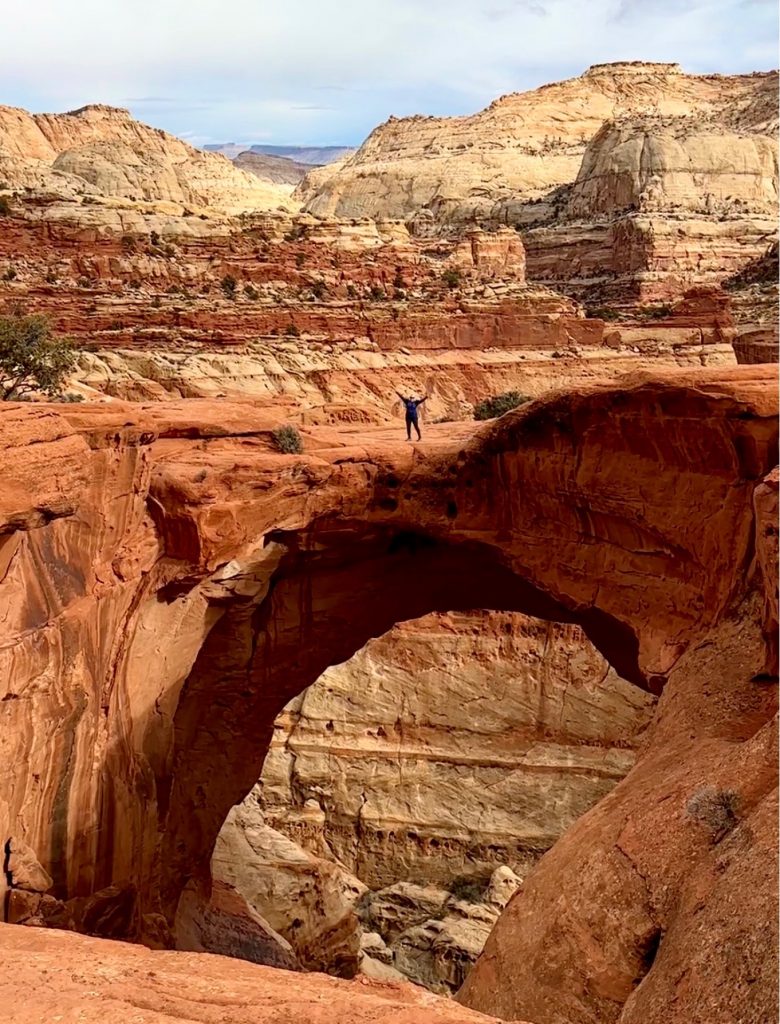
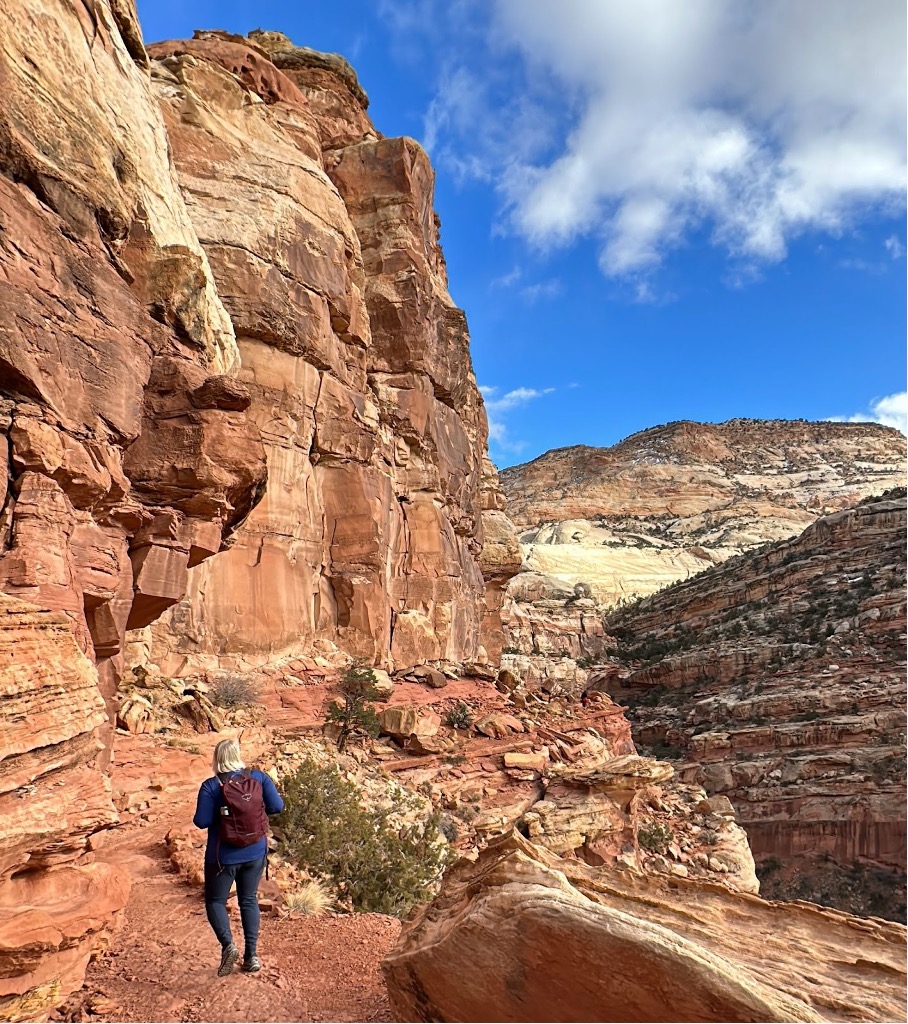
If you only have time for one short hike in the park, make it the Cassidy Arch Trail. Nothing beats that top-of-the-world feeling of standing on top of the arch. This photo opp makes the perfect souvenir for your visit.
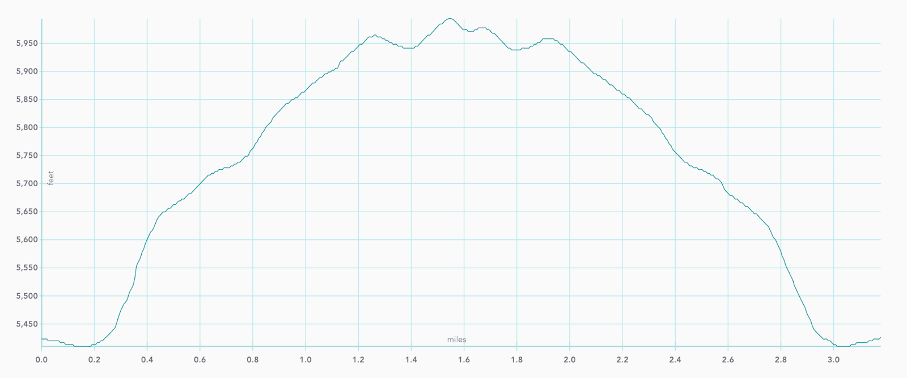
For the first 0.2 miles, you hike on the Grand Wash trail, then turn left at the Cassidy Arch sign and begin a steep ascent for a little over ¼ of a mile. When the trail levels off, you are treated to views of the arch in the distance, the Grand Wash Far below, and Fern’s Nipple formation.
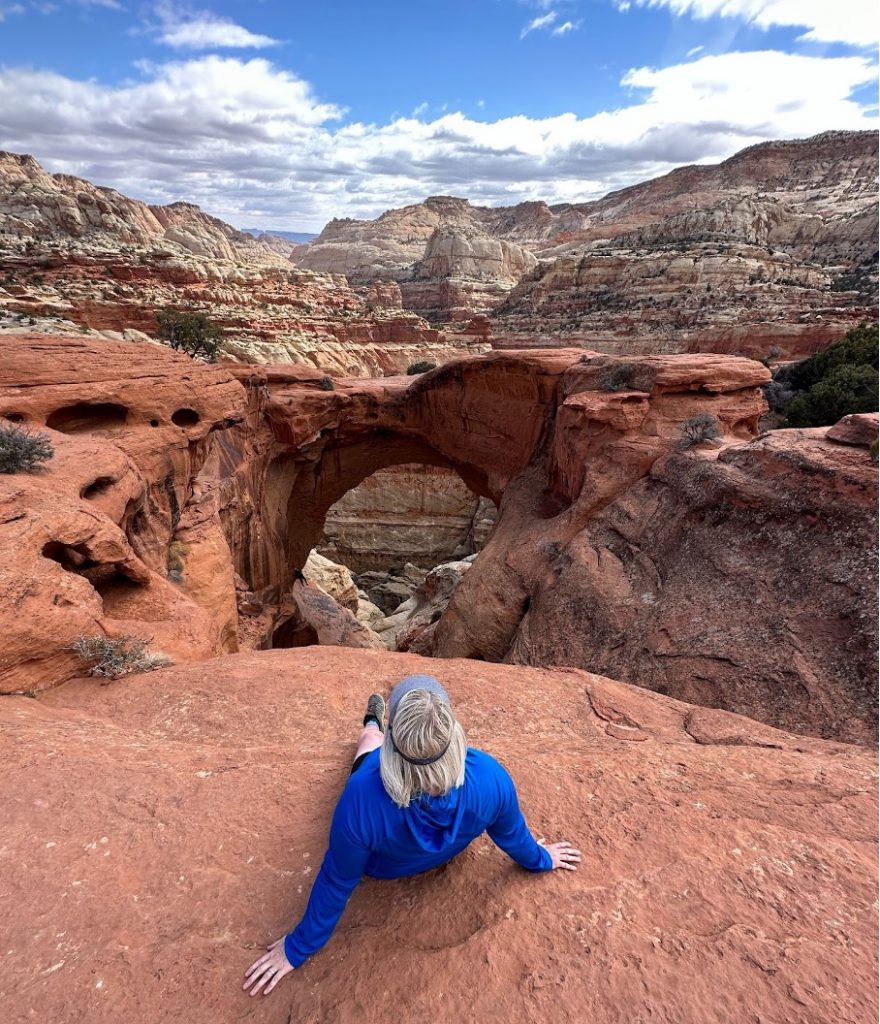
Follow the trail and sandstone cairns to the arch. Stop and savor the views, and if you are feeling brave enough, walk from either side to grab your iconic photo.
While the top of the arch is wide enough to cross safely, make sure to hold the hand of any children as there are no guard rails or fencing.
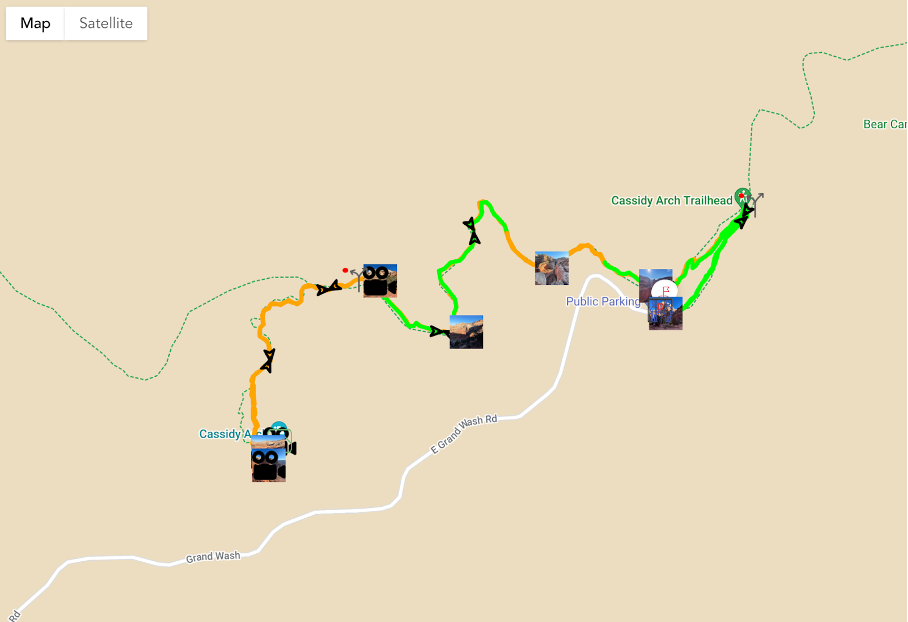
- Trailhead: Grand Wash Trailhead at the end of Grand Wash Road Drive 3.5 miles south of the visitor’s center, then turn left on the dirt Grand Wash Road. Drive to the end of the road.
- Distance: 3.2 miles with 650 ft elevation gain. Moderate
- Other Trail Information: Dogs and Drones are not permitted. Bathrooms at the trailhead.
Navajo Knobs
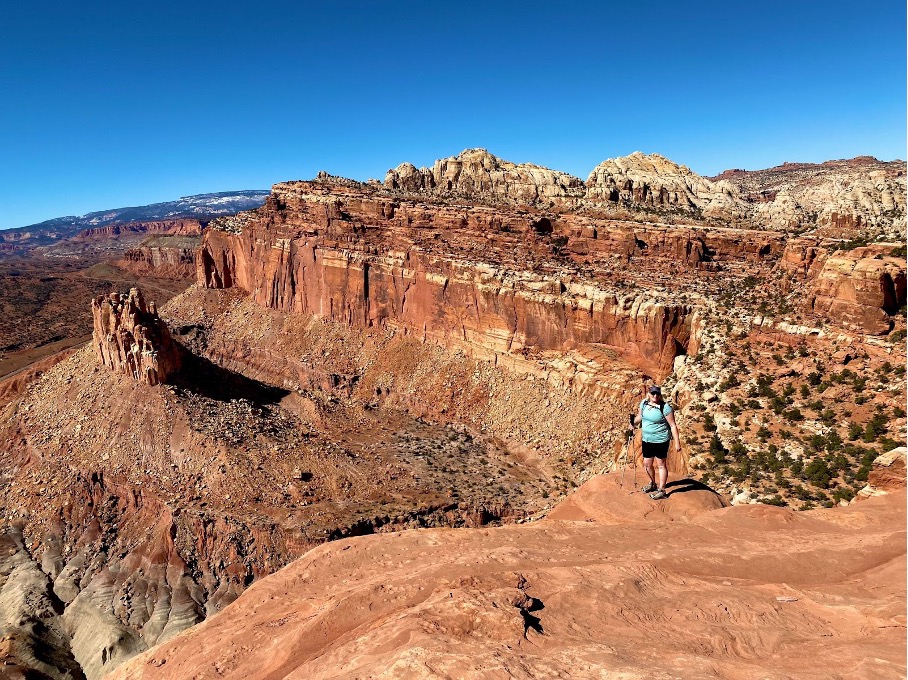
Want the best panoramic views of the Fruita district of Capitol Reef ? Then Navajo Knobs is the tail for you! From the outset, you begin the hike with stairs that parallel the Fremont River before switching back and heading towards Hickman Bridge, a worthy short detour to the hike (take the left fork when the trail branches. If you want a short family-friendly adventure, you can just hike to Hickman Natural Bridge.
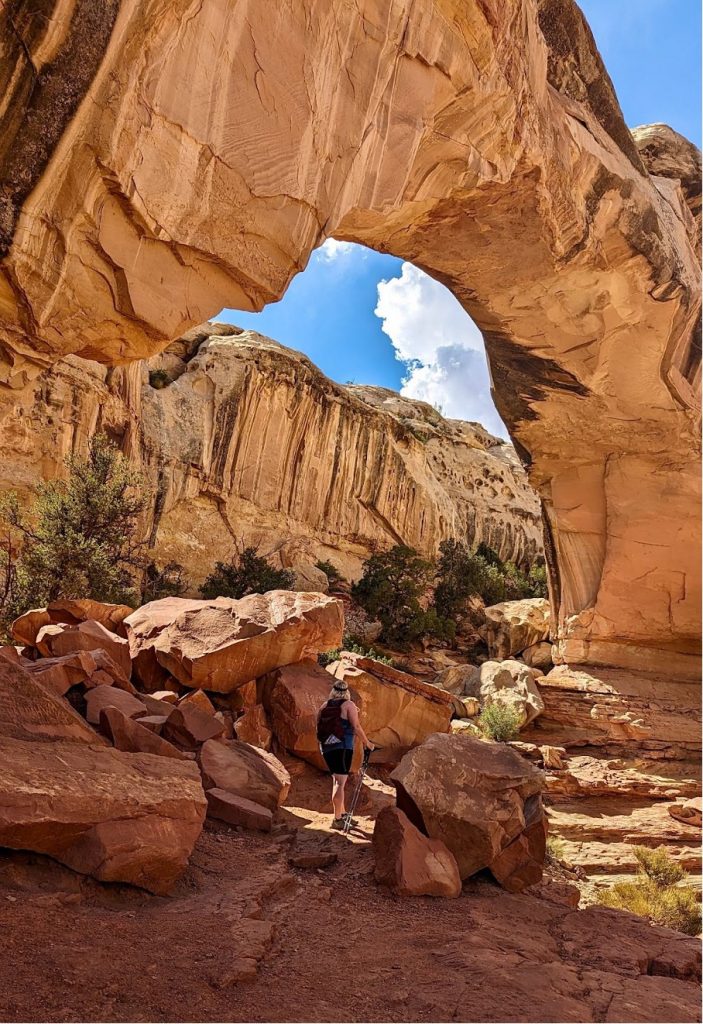
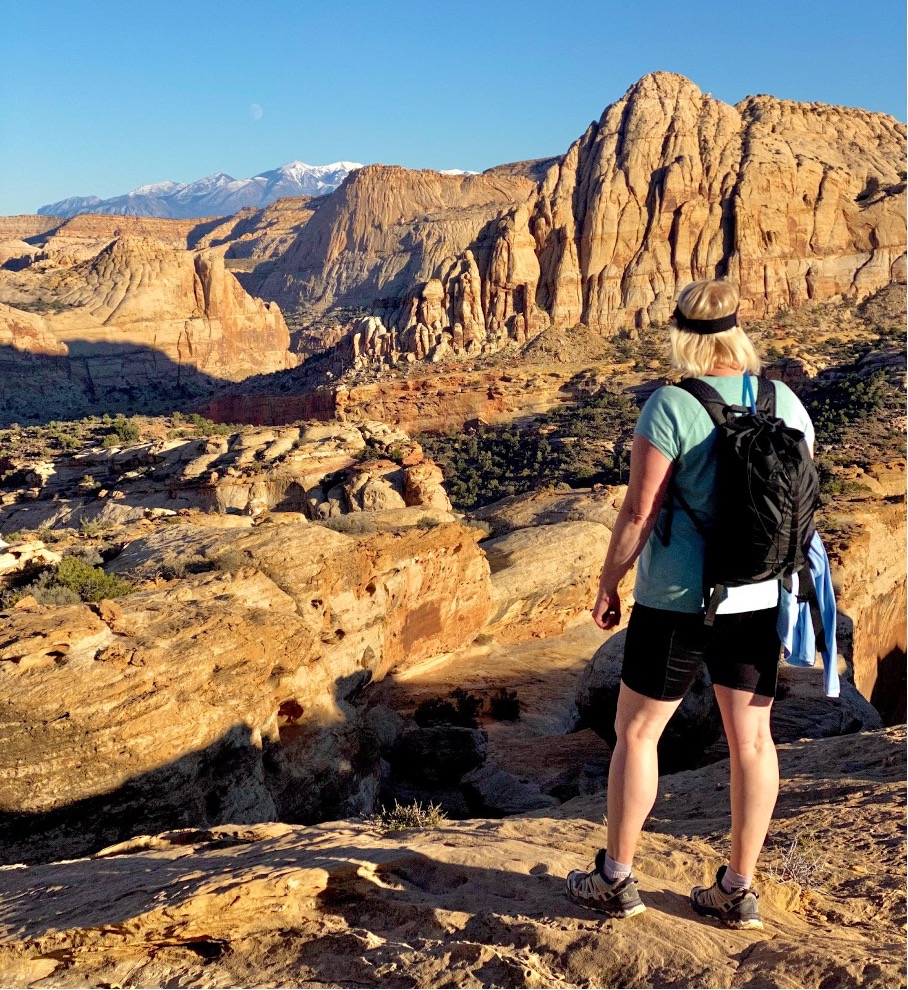
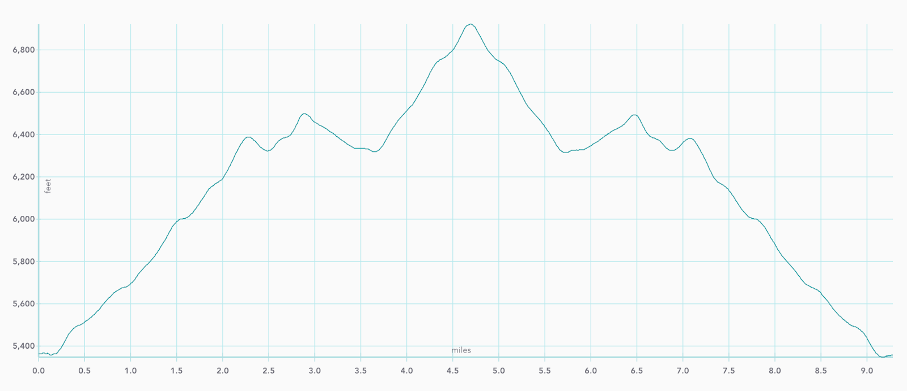
After visiting the bridge, retrace your steps back to thre trail junction and then take the opposite fork in the trail. As the trail climbs, you’ll enjoy views of Pectol’s Pyramid and Capitol Dome. About halfway up the trail, you will reach the Rim Overlook. Enjoy the views of the Fruita District of the park, this is a great turnaround point if you want a shorter hike. From there, continue climbing the red and white sandstone, hugging the cliffside as you enjoy views overlooking the Castle Rock formation below you. As you come closer to the knobs, you can choose to do some easy scrambling to the top for views of the Henry Mountains, and the fascinating formations and canyons of Capitol Reef. After you’ve taken in the views, retrace your steps back to the trailhead.
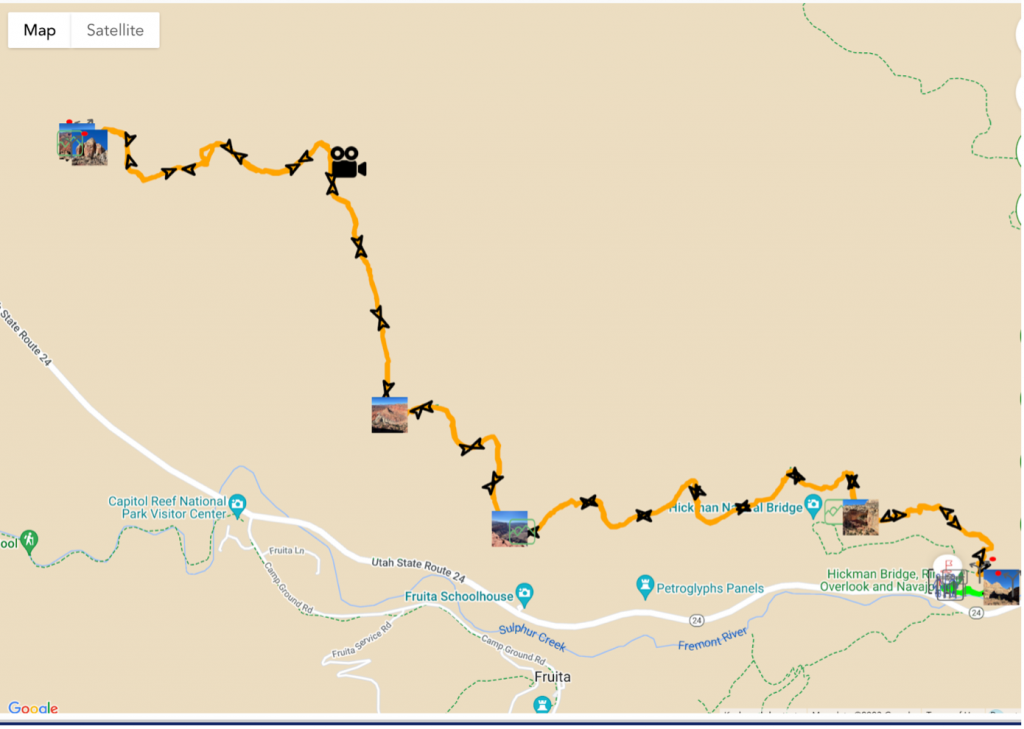
Trailhead: Hickman Bridge Trailhead is located off of Highway 24 south of the Visitor’s Center.
Distance:
- Hickman Bridge: 1.8 miles with 377 ft. gain
- Rim Overlook: 2.6 miles with 1,110 ft elevation gain. Moderate
- Navajo Knobs: 9.3 miles with 2.,067 ft. elevation gain-Strenuous
Other Trail Information: Dogs and Drones are not permitted. Bathrooms at the trailhead.
I hope this blog post has inspired you to get out and explore Utah national Parks. These are truly amazing hikes that you will never forget!

